Imagine pulling a warm, crusty loaf of sourdough bread right out of your oven, the aroma filling your kitchen and the crispy crust crackling as you slice into it. Baking sourdough bread in a Dutch oven is a simple way to create bakery-quality bread at home, even if you’ve never baked before.
If you’ve ever wanted to master the art of sourdough, this method will give you the perfect rise, a golden crust, and a soft, chewy inside every time. Keep reading, and you’ll discover easy steps and tips that will turn your kitchen into your favorite bakery.
Choosing The Right Ingredients
Choosing the right ingredients is the foundation of baking perfect sourdough bread in a Dutch oven. Each component affects the flavor, texture, and rise of your loaf. Paying close attention to what you use can turn a simple recipe into an outstanding homemade bread experience.
Selecting Quality Flour
Your flour is more than just a base; it defines the crumb and crust. Opt for unbleached, high-protein bread flour or a blend including whole wheat for richer flavor. Freshness matters—flour stored too long loses its strength, resulting in dense bread.
Have you noticed how different brands affect your dough's elasticity? Experiment with local mills or organic flours to find what works best with your starter.
Using Active Sourdough Starter
An active starter is your dough's engine. It should bubble and smell pleasantly tangy before you add it to your mix. Feeding your starter regularly ensures it stays vigorous and capable of giving your bread a good rise.
If your starter is sluggish, your bread might turn out flat or dense. Try feeding it twice a day for a few days before baking to boost its activity.
Importance Of Water Quality
Water might seem simple, but its quality can make a surprising difference. Use filtered or bottled water if your tap water is heavily chlorinated. Chlorine can kill the wild yeast and bacteria in your starter, slowing fermentation.
Have you ever thought about the temperature and mineral content of your water? Lukewarm water encourages yeast activity, while minerals can enhance flavor and dough strength.

Credit: mamasonabudget.com
Preparing The Dough
Mix flour, water, salt, and sourdough starter until a sticky dough forms. Let it rest and develop flavor through fermentation. Gentle folding during rising helps build strength and texture.
Preparing the dough is a crucial step in making sourdough bread. This is where the magic begins. The dough's texture and flavor start forming here. Let's dive into the essential steps of preparing your dough for baking.
Mixing Ingredients
Begin with the right ingredients. You'll need flour, water, salt, and your sourdough starter. Measure each one carefully. Use a large mixing bowl. Combine all ingredients gently. Stir them until you have a rough dough. This stage combines flavors and textures. Ensure there are no dry flour patches. The dough should be sticky and shaggy.
Autolyse Process
Allow the dough to rest. This is called the autolyse process. Let it sit for 30 minutes to an hour. During this time, gluten develops. This makes the dough stretchy and strong. It also improves the bread's flavor. Cover the bowl with a damp cloth. This prevents the dough from drying out.
Kneading Techniques
Kneading is essential for texture. Use a fold and stretch method. Wet your hands to prevent sticking. Gently stretch the dough and fold it over itself. Repeat this process several times. Knead for about 10 to 15 minutes. The dough should become smooth and elastic. This builds the gluten network. It will hold the gas bubbles during fermentation. Proper dough preparation is key to perfect sourdough bread. Each step builds flavor and texture. Pay attention to detail for best results.
First Rise And Folding
The first rise and folding stage is crucial for developing sourdough’s texture and flavor. This phase allows the dough to ferment and strengthen before shaping. Proper fermentation enhances the bread’s crumb and crust.
During this time, the dough slowly develops gluten. Gentle folding helps trap air and redistribute yeast and bacteria. This process supports even fermentation and improves dough structure.
Bulk Fermentation Time
Bulk fermentation usually takes 3 to 5 hours at room temperature. The exact time depends on temperature and starter activity. Warmer environments speed up fermentation, while cooler ones slow it down. Check the dough regularly to avoid over-proofing.
Stretch And Fold Method
Use the stretch and fold technique every 30 to 45 minutes. Wet your hands to prevent sticking. Gently lift one side of the dough and fold it over the center. Repeat on all four sides. This strengthens gluten without knocking out air.
Signs Of Ready Dough
- The dough looks puffed and slightly domed.
- It feels airy and soft but holds its shape.
- When poked gently, the indentation slowly springs back.
- Visible bubbles appear on the surface or inside.
These signs indicate the dough is ready for shaping and the second rise.
Shaping The Loaf
Shaping the loaf is a key step in baking sourdough bread. It helps the dough hold its form and rise evenly. Proper shaping also creates a nice crust and texture after baking.
This process starts with gentle handling and ends with a tight, smooth loaf. The dough needs to be soft but firm enough to shape. Avoid pressing too hard to keep air bubbles inside.
Pre-shaping Tips
Before shaping, lightly flour your work surface. Gently turn the dough onto the surface without deflating it. Use your hands to fold the dough over itself a few times. This helps create tension inside the dough.
Let the dough rest for 15 to 30 minutes after pre-shaping. This relaxes the gluten, making final shaping easier. Keep the dough covered with a cloth to prevent drying.
Final Shaping Steps
Start by dusting your hands and the dough with flour. Hold the dough and stretch the edges toward the center. Turn the dough and repeat until the surface feels tight and smooth.
Use your palms to gently roll the dough into a round or oval shape. Pinch the seams at the bottom to seal the loaf. This prevents the dough from spreading during baking.
Using Proofing Baskets
Proofing baskets support the dough during its final rise. Lightly dust the basket with flour or line it with a floured cloth. Place the shaped dough seam side up in the basket.
The basket keeps the dough’s shape and creates a beautiful pattern on the crust. Cover the basket with a cloth or plastic wrap to keep moisture in. Let the dough rise until it almost doubles in size.
Second Rise And Proofing
The second rise and proofing stage is key for perfect sourdough bread. This step allows the dough to develop air pockets, texture, and flavor. Proper proofing ensures your bread will have a beautiful crust and soft crumb. Timing and temperature play important roles during this phase.
Room Temperature Proofing
Proofing at room temperature helps the dough rise steadily. Keep the dough covered with a damp cloth or plastic wrap to avoid drying out. This process usually takes 2 to 4 hours. Watch for the dough to nearly double in size. It should feel light and airy when gently pressed.
Cold Fermentation Benefits
Cold fermentation means proofing the dough in the fridge. This slows down yeast activity and enhances the flavor. The dough can rest for 12 to 24 hours or longer. It also makes the dough easier to handle before baking. Cold fermentation can improve crust color and crumb texture.
When To Bake
The dough is ready to bake when it springs back slowly after a gentle poke. It should feel soft but hold its shape. Over-proofed dough may collapse, while under-proofed dough stays dense. Use your eyes and touch to decide the right moment. Baking too early or late affects the final bread quality.
Baking In The Dutch Oven
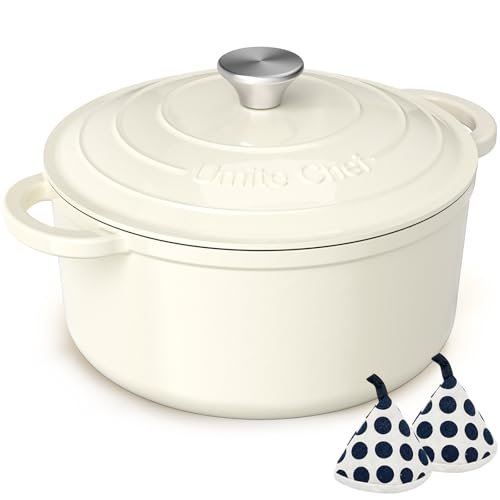
Baking sourdough bread in a Dutch oven creates a perfect crust and soft interior. The heavy pot traps heat and moisture, simulating a professional steam oven. This technique helps the dough rise fully and develop rich flavors. Follow these key steps to ensure excellent results.
Preheating The Dutch Oven
Place the Dutch oven with its lid in the oven. Heat it at 450°F (230°C) for at least 30 minutes. This makes the pot very hot. A hot Dutch oven gives the bread a strong oven spring. It helps form a crispy crust and even baking.
Transferring Dough Safely
Use parchment paper to lift the dough easily. Carefully remove the hot Dutch oven from the oven. Place the dough inside on the parchment paper. Avoid touching the hot pot with bare hands. Quickly cover the pot with its lid. This traps steam and heat inside.
Creating Steam For Crust
The Dutch oven traps moisture released by the dough. Steam keeps the crust soft at first, allowing the bread to expand. After 20-25 minutes, remove the lid to dry the crust. This step helps the crust turn golden brown and crisp. The steam is essential for a bakery-quality crust at home.
Achieving The Perfect Crust
Achieving the perfect crust on sourdough bread baked in a Dutch oven depends on controlling heat, moisture, and timing. The crust should be deep golden, crisp, and crackly. This happens by managing the baking time, knowing when to remove the lid, and allowing the bread to cool correctly. These steps create a crust that is both beautiful and full of flavor.
Baking Time And Temperature
Preheat the Dutch oven to a high temperature, around 450°F (232°C). Bake the bread with the lid on for about 20-25 minutes. This traps steam, helping the crust develop a nice shine and strength.
After removing the lid, continue baking at 425°F (218°C) for 15-20 minutes. This dries out the crust, making it crisp and brown. Watch the bread closely to avoid burning.
Removing The Lid Technique
Remove the Dutch oven lid carefully after the first baking phase. Use oven mitts and a sturdy grip to avoid accidents. This step lets moisture escape, which hardens the crust.
Open the oven door slowly to prevent temperature drops. Place the lid on a heat-safe surface. Do not cover the bread again during the last baking stage.
Cooling For Crust Development
Once baking ends, transfer the bread to a wire rack immediately. This allows air to circulate under and around the bread. Cooling here is essential for crust texture.
Do not wrap the bread until fully cooled. Wrapping traps moisture and softens the crust. Wait at least one hour before slicing to keep the crust crisp.

Credit: www.youtube.com
Troubleshooting Common Issues
Baking sourdough bread in a Dutch oven can sometimes bring unexpected results. Common issues like dense bread, crust problems, or proofing errors often cause frustration. Troubleshooting these problems helps improve your baking skills and creates better bread.
Dense Or Heavy Bread
Dense bread usually means the dough did not rise enough. Check if your starter is active and bubbly before mixing. Knead the dough well to develop gluten. Allow enough time for the dough to ferment and rise. Avoid adding too much flour during shaping. Use warm water, not hot, to help yeast grow. Baking at the right temperature also affects the bread’s texture.
Crust Too Hard Or Soft
A very hard crust can result from baking too long or too hot. Reduce oven temperature slightly or shorten baking time. If the crust is too soft, bake uncovered for the last 10 minutes. Make sure to preheat the Dutch oven to create steam. Steam helps form a crisp crust. Avoid opening the lid too early during baking to keep moisture inside.
Underproofed Or Overproofed Dough
Underproofed dough has tight, dense crumbs and little rise. Let the dough rest longer at room temperature. Check if the dough springs back slowly when poked. Overproofed dough may collapse or feel very soft. Reduce rising time or proof in a cooler spot. Use the poke test to find the right proof. Proper proofing creates a light, airy texture.
Tips For Consistent Results
Consistent baking depends on measuring ingredients carefully and maintaining the right dough temperature. Using a well-heated Dutch oven helps create a crispy crust every time. Timing the baking process precisely ensures even cooking and perfect results.
Baking sourdough bread in a Dutch oven is both an art and a science, and achieving consistent results can be a delightful challenge. Mastering the nuances of this process ensures that each loaf you pull from the oven is crusty, airy, and flavorful. Whether you're a seasoned baker or just starting out, these tips will help you refine your technique and bake with confidence every time.
Maintaining Starter Health
Keeping your sourdough starter healthy is crucial for consistent results. Feed your starter regularly, ideally every 12 to 24 hours, especially if it's kept at room temperature. A bubbly, active starter is key to a good rise and a complex flavor profile in your bread. Observe your starter's activity levels; a sluggish starter may need more frequent feedings or a different flour blend. If your starter isn't doubling in size within 4-6 hours after feeding, it might be time to troubleshoot. Experiment with different flours, such as whole wheat or rye, which can sometimes boost activity.
Measuring Ingredients Accurately
Accuracy in measuring your ingredients is essential for consistency. Use a digital kitchen scale to weigh your flour, water, and starter. This method is far more reliable than using measuring cups, which can vary based on how you scoop. Even small variations in ingredient amounts can affect the dough's hydration and, ultimately, the bread's texture. Keep a journal of your bread-making sessions to track what works best. This habit helps in identifying patterns and making necessary adjustments for future bakes.
Adjusting For Climate And Altitude
Your local climate and altitude can significantly impact your bread-baking process. In humid environments, you may need to reduce the water in your dough to prevent it from becoming too sticky. Conversely, in dry climates, adding a bit more water might be necessary. Altitude affects rising times and dough hydration, so if you're baking at a high altitude, consider reducing the yeast or starter amount and increasing the rising time. It's all about finding that sweet spot for your specific environment. Have you noticed changes in your dough's behavior with the seasons? Adjusting for these variables can lead to more predictable and satisfying results.

Credit: savorthebest.com
Frequently Asked Questions
How Long Should I Preheat The Dutch Oven?
Preheat the Dutch oven for 30 to 45 minutes at 450°F (232°C). This ensures even heat distribution. Proper preheating helps create a crispy crust and perfect bake for your sourdough bread.
Can I Use Any Dutch Oven For Baking Sourdough?
Yes, use any oven-safe Dutch oven with a tight-fitting lid. Cast iron Dutch ovens are ideal for heat retention. Avoid non-oven-safe materials to prevent damage or poor baking results.
Why Bake Sourdough Bread In A Dutch Oven?
A Dutch oven traps steam during baking, which keeps the crust moist. This steam helps develop a crunchy, golden crust. It also ensures even heat, resulting in a well-baked loaf.
Should I Score My Sourdough Before Baking In Dutch Oven?
Yes, scoring the dough allows controlled expansion during baking. It prevents tearing and creates an attractive pattern. Use a sharp blade to make quick, shallow cuts just before baking.
Conclusion
Baking sourdough bread in a Dutch oven brings great results. The heavy lid traps steam, creating a crispy crust. You only need simple tools and ingredients. Follow the steps carefully and be patient. Each bake will help you improve your skills.
Enjoy the smell and taste of fresh bread. Share your homemade bread with family and friends. Keep practicing to bake better every time. This method makes sourdough baking easy and fun. Give it a try, and enjoy your delicious bread!