Are you wondering how long to cook chicken breast on your electric grill to get it juicy and perfectly done every time? You’re not alone.
Cooking chicken breast can be tricky—too little time and it’s raw, too long and it turns dry. But don’t worry, this guide will give you clear, simple answers so you can enjoy delicious, tender chicken without the guesswork. Keep reading, and you’ll learn the exact timing and tips to master your electric grill like a pro.
Credit: flavorfulife.com
Choosing The Right Chicken Breast
Choosing the right chicken breast is crucial for perfectly cooked results on your electric grill. The quality and condition of the chicken directly affect cooking time and flavor. Before you start grilling, consider a few key factors to ensure your chicken turns out juicy and tender every time.
Fresh Vs Frozen
Fresh chicken breasts usually cook faster and have a better texture than frozen ones. If you use frozen chicken, you’ll need to thaw it completely before grilling to avoid uneven cooking. Cooking frozen chicken directly on the grill often leads to dry edges and raw centers, which no one wants.
Have you ever rushed and thrown frozen chicken on the grill? I have—and it never ended well. Planning ahead and thawing your chicken in the fridge overnight makes a big difference.
Thickness And Size Impact
The thickness and size of your chicken breast play a huge role in how long it takes to cook. Thicker pieces require more time to reach a safe internal temperature, while thinner ones cook quickly but risk drying out if left too long.
Try to select chicken breasts that are similar in size for even grilling. If you have thicker breasts, consider pounding them to an even thickness. This simple step helps you avoid guessing and ensures every bite is cooked just right.
Preparing Chicken For Grilling
Preparing chicken for grilling sets the foundation for a juicy and flavorful meal. Taking time to properly get your chicken breast ready can make all the difference between a dry, tough bite and a tender, delicious one. Let’s look at how marinating and seasoning can elevate your electric grill cooking experience.
Marinating Tips
Marinating is more than just adding flavor; it helps keep your chicken moist while cooking on an electric grill.
- Use an acid like lemon juice or vinegar to tenderize the meat.
- Include oil to lock in moisture and prevent sticking.
- Add herbs and spices that complement your taste preferences.
Let your chicken marinate for at least 30 minutes, but no longer than 4 hours to avoid mushy texture. Have you tried marinating in yogurt? It’s a game-changer for tenderness.
Seasoning Ideas
Seasoning your chicken breast before grilling adds a burst of flavor without extra effort. Simple salt and pepper work wonders, but you can also experiment with blends like:
- Smoked paprika and garlic powder for a smoky kick
- Cumin and coriander for a warm, earthy taste
- Chili powder and lime zest for a tangy heat
Sprinkle seasoning evenly on both sides and press gently to help it stick. What’s your go-to seasoning combo that keeps you coming back for more?
Preheating The Electric Grill
Preheating the electric grill is a key step before cooking chicken breast. It sets the stage for even cooking and juicy results. Without preheating, chicken may stick or cook unevenly. A properly heated grill helps to seal in moisture and flavor.
Optimal Temperature Settings
Set the electric grill to medium-high heat, around 375°F to 400°F (190°C to 205°C). This temperature cooks chicken breast evenly without drying it out. Avoid very high heat to prevent burning the outside while the inside stays raw. Use a grill with an adjustable thermostat for better control.
Importance Of Preheating
Preheating ensures the grill plates reach the right temperature before cooking. It reduces sticking and helps create grill marks. A hot grill cooks chicken quickly, locking in juices for tender meat. Take 5 to 10 minutes to preheat the grill fully. This small wait improves texture and taste.
Cooking Times For Chicken Breast
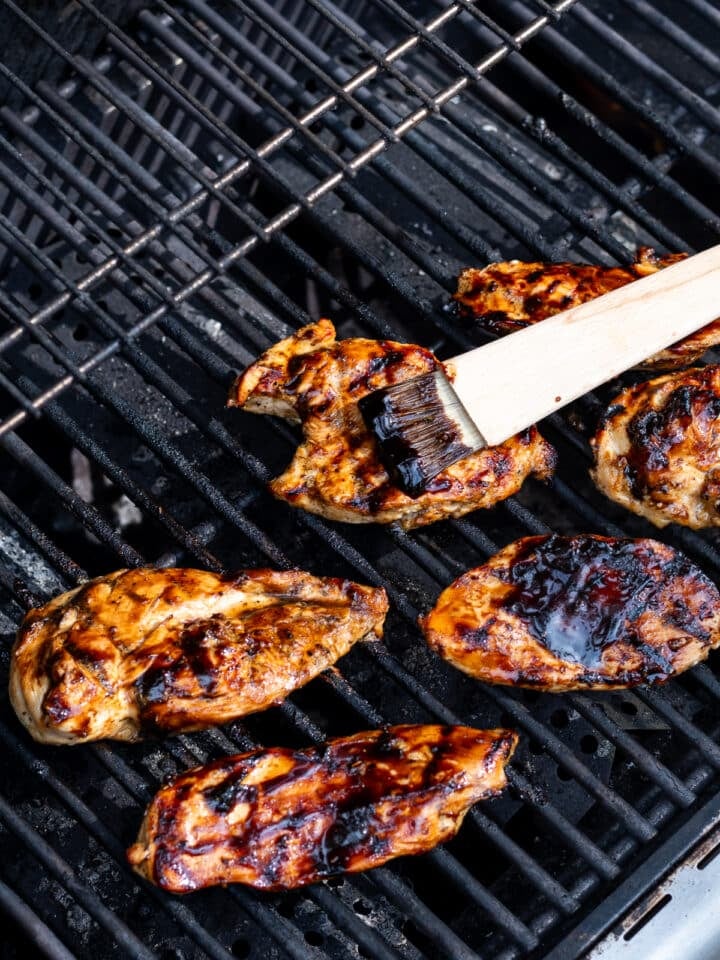
Cooking chicken breast on an electric grill takes about 6-8 minutes per side. Thicker pieces may need a bit longer. Always ensure the internal temperature reaches 165°F for safety.
Cooking chicken breast on an electric grill can be a game-changer for your meals. It's quick, convenient, and can transform a simple chicken breast into a juicy delight. However, understanding the right cooking times is crucial to avoid dry, rubbery chicken or undercooked meat that could spoil your dinner plans. Here's a guide to help you nail the timing every time.
Boneless Vs Bone-in
Boneless chicken breasts typically cook faster than their bone-in counterparts. Boneless pieces usually require about 6 to 8 minutes per side. The absence of bone means the heat penetrates the meat more quickly. In contrast, bone-in chicken breasts can take 10 to 15 minutes per side. The bone acts as an insulator, slowing down the cooking process. Always ensure the internal temperature reaches 165°F for safety.
Thickness-based Timing
Thickness plays a significant role in determining how long you should cook your chicken breast. Thicker pieces, over an inch thick, may require additional time, ranging from 10 to 12 minutes per side. Thinner pieces, around half an inch thick, often need just 4 to 5 minutes per side. Using a meat thermometer can be a lifesaver here, ensuring your chicken is cooked perfectly. Have you ever tried pounding your chicken to even thickness before grilling? This simple step can lead to more consistent cooking times and juicier results. Consider experimenting with different thicknesses to see which one brings out the best flavors on your grill.
Checking Doneness
Checking the doneness of chicken breast on an electric grill is crucial to ensure it is both safe and delicious. Undercooked chicken can pose health risks, while overcooked meat becomes dry and tough. You want to hit the perfect balance, and knowing how to check doneness will give you confidence every time you grill.
Using A Meat Thermometer
A meat thermometer is the most reliable tool to check if your chicken breast is done. Insert it into the thickest part of the breast without touching the grill or bone. The safe internal temperature for cooked chicken is 165°F (74°C).
Using a thermometer takes away the guesswork and helps you avoid overcooking. If you don’t have one, consider investing in a digital instant-read thermometer—it’s a game changer. Have you ever cut into your chicken only to find it pink inside? A thermometer prevents that disappointment.
Visual And Texture Cues
If you don’t have a thermometer, you can rely on visual and texture signs. The juices should run clear when you press the thickest part of the breast or make a small cut. If the juices look pink or reddish, the chicken needs more time.
Pay attention to the texture as well. Properly cooked chicken breast feels firm but still slightly springy. If it’s too soft or jelly-like, it’s undercooked. If it’s very hard or rubbery, it’s likely overdone.
Next time you grill, try combining these cues with a quick temperature check. It’s a simple habit that will improve your grilling results and keep your meals safe and tasty.

Credit: www.theseasonedmom.com
Common Mistakes To Avoid
Cooking chicken breast on an electric grill can be quick and convenient, but it’s easy to slip up. Avoiding common mistakes is key to juicy, flavorful results every time. Let’s look at the pitfalls that can ruin your chicken and how to steer clear of them.
Overcooking
Overcooking chicken breast makes it dry and tough. You might think cooking longer guarantees safety, but it actually strips moisture out fast. Have you ever bitten into chicken that felt like chewing rubber? That’s the result of overcooking.
To prevent this, monitor the internal temperature closely. Aim for 165°F (74°C) and remove the chicken as soon as it reaches that point. Consider using an instant-read thermometer for precise timing. Also, letting the chicken rest for a few minutes after grilling redistributes juices for better taste.
Undercooking
Undercooked chicken is not just unpleasant; it’s unsafe. Pink, raw spots inside the meat can carry harmful bacteria. Have you ever doubted if your chicken was fully cooked? It’s better to double-check than risk foodborne illness.
Electric grills can cook unevenly if not preheated properly. Make sure your grill is hot before placing the chicken on it. Cooking breasts that are too thick without flattening or butterflying them also leads to undercooked centers. Use a meat thermometer and cut into the thickest part if unsure.
Resting Chicken After Grilling
Resting chicken after grilling is a crucial step that many overlook. It allows the juices to redistribute, making your chicken breast juicier and more flavorful. Skipping this step can leave your perfectly grilled chicken dry and less enjoyable.
Why Resting Matters
When you grill chicken, the heat forces the juices toward the center of the meat. If you cut into it right away, those flavorful juices spill out onto your plate. Resting gives the meat time to reabsorb the juices, resulting in a tender bite every time.
I once rushed to serve my grilled chicken immediately and ended up with dry, tough meat. After learning to rest it properly, I noticed a huge difference in taste and texture. Isn’t it worth waiting a few minutes for better chicken?
How Long To Rest
For chicken breasts, resting for about 5 to 10 minutes works best. This time frame is enough for the juices to settle without letting the chicken cool down too much. You can loosely cover the chicken with foil to keep it warm during this period.
Try setting a timer next time you grill and resist the urge to cut right away. You’ll be surprised how much juicier your chicken tastes. How long have you been resting your grilled chicken?

Credit: www.cuisinart.com
Tips For Juicy And Tender Results
Cooking chicken breast on an electric grill can sometimes result in dry meat. Achieving juicy and tender chicken requires a few simple tricks. These tips help lock in moisture and enhance flavor. Perfect for anyone wanting a delicious, healthy meal with ease.
Brining Techniques
Brining adds moisture and flavor to chicken breasts. Soak the chicken in a saltwater solution for 15 to 30 minutes. Use about 1/4 cup of salt per 4 cups of water. You can add sugar or herbs for extra taste. Rinse the chicken before grilling to remove excess salt. This process helps the meat stay juicy during cooking.
Using Foil Wraps
Wrapping chicken breasts in foil creates a steamy environment. This traps juices and cooks the meat evenly. Place a chicken breast on a piece of foil, add seasoning, then seal it tightly. Cook on the electric grill for the recommended time. Open the foil carefully to avoid steam burns. Foil wraps keep chicken tender and prevent drying out.
Frequently Asked Questions
How Long To Grill Chicken Breast On An Electric Grill?
Cook chicken breast for 6-8 minutes per side on medium heat. Ensure internal temperature reaches 165°F (74°C) for safety. Use a meat thermometer to check doneness and avoid overcooking for juicy results.
What Temperature Should An Electric Grill Be For Chicken?
Set your electric grill to medium heat, around 350°F (175°C). This temperature cooks chicken evenly without burning the outside. It helps maintain moisture and achieves a perfect grilled texture.
How To Tell When Chicken Breast Is Fully Cooked?
Check chicken’s internal temperature with a meat thermometer; it should read 165°F (74°C). The juices should run clear, and meat should be firm but not dry. Cut into the thickest part to verify no pink remains.
Can Marinated Chicken Breast Affect Cooking Time?
Yes, marinated chicken may cook slightly faster due to moisture and acidity. Monitor closely and adjust grilling time by 1-2 minutes if needed. Always verify internal temperature to ensure it is fully cooked.
Conclusion
Cooking chicken breast on an electric grill takes about 6 to 8 minutes per side. Check the meat’s color and texture to know when it’s done. Avoid overcooking to keep the chicken juicy and tender. Use a meat thermometer to be sure it reaches 165°F inside.
Practice helps you find the perfect timing for your grill. Enjoy tasty, healthy chicken made just right every time. Simple steps bring great results. Give it a try today!