Are you wondering how long to cook chicken breast in your Dutch oven to get it perfectly tender and juicy every time? Cooking chicken breast can be tricky—too little time and it’s undercooked, too long and it turns dry and tough.
But don’t worry, you’re about to discover the simple timing secrets that will make your chicken breast come out just right. Keep reading, because mastering this will change the way you cook and enjoy your meals forever.
Choosing The Right Chicken Breast
Choosing the right chicken breast is key to perfect results in a Dutch oven. The type of chicken you select affects cooking time and texture. Knowing the differences helps you cook evenly and safely. Consider freshness and size for the best outcome.
Fresh Vs. Frozen
Fresh chicken breasts cook faster than frozen ones. Frozen chicken needs to thaw completely before cooking in a Dutch oven. Thawing ensures even heat distribution and avoids soggy spots. Fresh chicken often has better texture and flavor. Frozen chicken is convenient but may release extra water during cooking. This can affect browning and sauce consistency.
Size And Thickness Considerations
Chicken breast size and thickness influence cooking time greatly. Thicker breasts take longer to cook through than thinner ones. Uniform thickness helps cook all pieces evenly. Use a meat mallet to flatten thick breasts if needed. Smaller breasts cook quickly but can dry out easily. Aim for breasts about 1 inch thick for balanced cooking. Adjust heat and time based on size to avoid undercooked or overcooked meat.

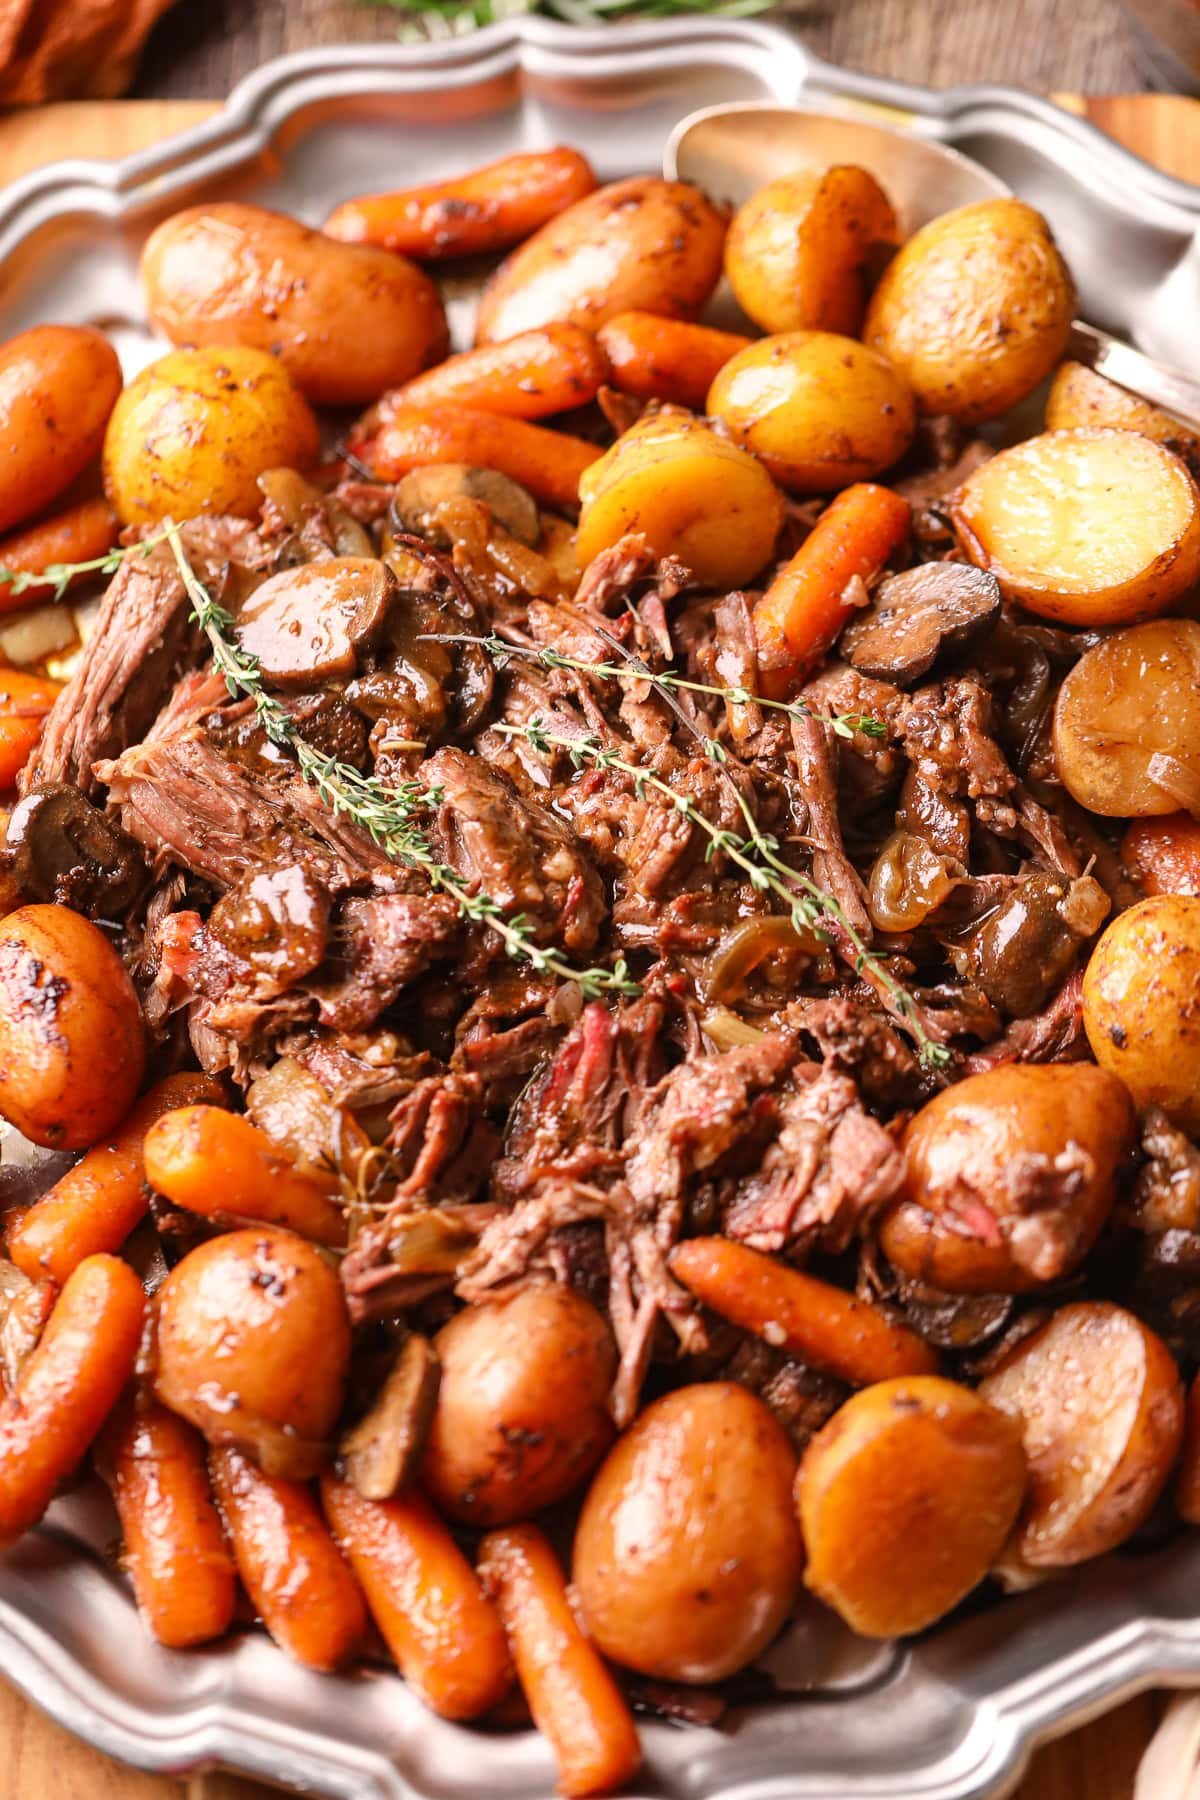
Credit: www.fourgenerationsoneroof.com
Preparing Chicken For The Dutch Oven
Getting your chicken breast ready for the Dutch oven is key to a juicy and flavorful meal. The way you prepare the chicken affects how it cooks and how well it absorbs flavors. Taking a few extra minutes to season and trim your chicken can make a big difference in the final dish.
Seasoning Tips
Start by patting the chicken breast dry with paper towels. This helps the seasoning stick better and promotes a nice crust during cooking.
Use a mix of salt, pepper, and your favorite herbs or spices. A simple combo like garlic powder, paprika, and thyme works well. Don’t just sprinkle the seasoning on top—rub it all over the chicken, including under the skin if possible.
Let the seasoned chicken rest for at least 15 minutes before cooking. This allows the flavors to soak in and can improve the overall taste.
Trimming And Tenderizing
Trim off any excess fat or silver skin from the chicken breast. These parts can be tough or chewy after cooking.
If your chicken breast is uneven in thickness, use a meat mallet or the bottom of a heavy pan to gently pound it to an even thickness. This ensures the chicken cooks evenly and avoids dry edges.
Have you ever bitten into a tough chicken breast? Tenderizing helps prevent that. It also helps the chicken absorb marinades or seasoning better, improving both texture and flavor.
Dutch Oven Cooking Basics
Cooking chicken breast in a Dutch oven is simple and rewarding. Understanding the basics of Dutch oven cooking helps achieve juicy, tender results every time. The right tools and preparation set the stage for perfect meals.
Selecting The Right Dutch Oven
Choose a Dutch oven with thick walls and a tight-fitting lid. Cast iron models hold heat evenly, which helps cook chicken consistently. Enameled Dutch ovens are easy to clean and do not need seasoning. Size matters too; pick one large enough for your chicken breasts to fit without crowding.
Preheating And Oil Use
Preheat the Dutch oven over medium heat before adding oil. This step prevents sticking and promotes even browning. Use oils with high smoke points like vegetable or canola oil. Add just enough oil to coat the bottom to keep the chicken moist and flavorful. Avoid overheating the oil to stop burning and unpleasant taste.
Cooking Times For Chicken Breast
Cooking chicken breast in a Dutch oven takes about 25 to 30 minutes at medium heat. Ensure the chicken reaches an internal temperature of 165°F for safety. This method keeps the meat tender and flavorful.
Cooking chicken breast in a Dutch oven can yield juicy results. The cooking time depends on the type and thickness of the chicken. Here, we explore specific cooking times for different chicken breast types.
Boneless Skinless Chicken
Boneless skinless chicken cooks faster. Preheat your Dutch oven to medium heat. Cook the chicken for 25-30 minutes. Ensure the internal temperature reaches 165°F (74°C). This prevents undercooked chicken.
Bone-in Chicken Breast
Bone-in chicken takes longer to cook. Preheat your Dutch oven to medium heat. Cook the chicken for 35-45 minutes. Check the internal temperature. It should also reach 165°F (74°C).
Adjusting For Thickness
Thicker chicken breasts need more time. Thin pieces cook faster. For thicker cuts, add 5-10 minutes. Always check the internal temperature. Consistent 165°F (74°C) ensures safe eating.
Cooking Techniques For Juicy Results
Achieving juicy chicken breast in a Dutch oven requires smart cooking techniques. These methods help lock in moisture and enhance flavor. Cooking chicken breast properly ensures it stays tender and delicious.
Searing Before Baking
Searing chicken breast creates a golden crust that adds flavor. It seals the juices inside the meat. Use medium-high heat and cook each side for 2-3 minutes. This step improves texture and taste before baking.
Slow Cooking Vs. High Heat
Slow cooking at low temperatures keeps chicken moist and tender. It allows flavors to develop gently. High heat cooks faster but risks drying out the meat. Choose slow cooking for soft chicken or high heat for quicker meals.
Using A Lid To Retain Moisture
Covering the Dutch oven traps steam, preventing dryness. The lid helps keep the chicken juicy by circulating moisture. Cook with the lid on to maintain tenderness throughout the process.

Credit: www.365daysofbakingandmore.com
Checking Doneness
Checking the doneness of chicken breast cooked in a Dutch oven is essential for safety and taste. Undercooked chicken can cause illness, while overcooked meat becomes dry and tough. Using clear signs helps you know exactly when the chicken is ready to serve.
Internal Temperature Guide
The best way to check chicken doneness is with a meat thermometer. Insert it into the thickest part of the breast. The safe temperature for cooked chicken is 165°F (74°C). At this temperature, harmful bacteria are killed.
Here is a quick reference for internal temperatures:
| Temperature (°F) | Doneness Level |
|---|---|
| 160°F (71°C) | Almost done, slightly pink inside |
| 165°F (74°C) | Safe and fully cooked |
| 170°F (77°C) | Well done, very firm |
Visual And Texture Cues
Besides temperature, look for clear visual and texture signs. The chicken should be white or very light pink inside. Juices running from the meat should be clear, not red or pink.
- Cut the thickest part and check the color inside
- Press the meat; it should feel firm but not hard
- If the surface is golden brown, it’s a good sign
Using these simple checks helps you cook chicken breast perfectly in your Dutch oven every time.
Resting And Serving Tips
After cooking chicken breast in a Dutch oven, the final steps of resting and serving are just as important as the cooking itself. These moments allow the meat to reach its full flavor potential and ensure a juicy bite every time. Let’s dive into why resting matters and how to serve your chicken breast for the best experience.
Why Resting Matters
Resting lets the juices inside the chicken redistribute evenly. If you cut into your chicken right away, those flavorful juices will spill out, leaving the meat dry.
Try resting your chicken breast for at least 5 to 10 minutes after cooking. Cover it loosely with foil to keep it warm without steaming it.
Think about how often you’ve been disappointed by dry chicken. Could a simple rest be the missing step in your cooking routine?
Best Serving Suggestions
Once rested, slice the chicken breast against the grain to keep it tender. This small trick makes a big difference in texture.
Serve your chicken with vibrant sides like roasted vegetables, a fresh salad, or creamy mashed potatoes. These add color and balance to your plate.
- Drizzle a little pan sauce or homemade gravy over the slices for extra flavor.
- Add fresh herbs like parsley or thyme for a burst of aroma and taste.
- Consider pairing with a light citrus or yogurt-based sauce to brighten the dish.
How will you elevate your next Dutch oven chicken breast with these serving ideas? Experiment with what you have and make it your own.
Troubleshooting Common Issues
Cooking chicken breast in a Dutch oven can sometimes lead to common problems. These issues include dry meat or undercooked centers. Understanding how to fix these problems helps improve your cooking results. The following tips offer simple solutions for typical cooking challenges.
Dry Chicken Solutions
Dry chicken breast means it cooked too long or at too high heat. To avoid dryness, try these tips:
- Lower the cooking temperature and cook slowly.
- Add broth or water to the Dutch oven to keep moisture.
- Cover the Dutch oven tightly with the lid to trap steam.
- Use a meat thermometer and remove chicken at 165°F (74°C).
- Let the chicken rest after cooking to keep juices inside.
Undercooked Chicken Fixes
Undercooked chicken is unsafe and unpleasant. Fix it by:
- Returning the chicken to the Dutch oven for a few more minutes.
- Covering the pot to ensure even heat distribution.
- Checking the thickest part with a meat thermometer for 165°F.
- Cutting the breast into smaller pieces next time for quicker cooking.

Credit: www.365daysofbakingandmore.com
Frequently Asked Questions
How Long Does Chicken Breast Take In A Dutch Oven?
Cooking chicken breast in a Dutch oven takes about 25 to 30 minutes. Timing varies with thickness and temperature. Use medium heat and check internal temperature reaches 165°F for safe eating.
Can I Cook Frozen Chicken Breast In A Dutch Oven?
Yes, you can cook frozen chicken breast in a Dutch oven. It will take approximately 50% longer than thawed chicken. Always ensure the internal temperature reaches 165°F before serving.
What Temperature Is Best For Dutch Oven Chicken Breast?
Medium heat is best for cooking chicken breast in a Dutch oven. It ensures even cooking without burning. Maintain the temperature around 325°F to 350°F for optimal results.
Should I Cover The Dutch Oven While Cooking Chicken Breast?
Yes, cover the Dutch oven while cooking chicken breast. Covering traps heat and moisture, which helps cook the chicken evenly and keeps it tender and juicy.
Conclusion
Cooking chicken breast in a Dutch oven takes time and care. Usually, 25 to 30 minutes works well at medium heat. Check the chicken’s inside temperature to be sure. It should reach 165°F (75°C) for safety. Let the chicken rest before cutting.
This keeps it juicy and tender. Using a Dutch oven helps cook evenly and lock in flavor. Try different spices or vegetables for new tastes. Practice makes perfect. Soon, you will enjoy delicious, well-cooked chicken every time. Simple steps lead to great meals.