Are you curious about how to make pellets for your pellet stove? Knowing how to create your own pellets can save you money and give you more control over the fuel you use.
Imagine having a steady supply of efficient, eco-friendly pellets made right at home. You’ll discover simple steps and expert tips to turn raw materials into quality pellets. Keep reading to learn how you can fuel your stove smarter and warmer all winter long.
Choosing Raw Materials
Choosing the right raw materials is crucial for making high-quality pellets for your pellet stove. The type of material you select affects the burning efficiency, ash content, and overall performance of your stove. It’s not just about grabbing any wood or biomass; the material's moisture level, density, and composition play a big role.
Wood Types For Pellets
Hardwoods like oak, maple, and birch are excellent choices for pellet production. They produce dense pellets that burn longer and generate more heat. Softwoods such as pine and fir burn faster but can still work well if you want quick heat.
Consider the moisture content of your wood before pelletizing. Wood with too much moisture leads to poor pellet quality and excessive smoke. Ideally, your wood should have moisture below 15% for efficient pellet making.
- Hardwood:Longer burn time, higher heat output, less ash.
- Softwood:Faster ignition, lighter pellets, easier to compress.
- Moisture:Keep it low to avoid crumbling pellets.
Have you ever noticed how some pellets leave a lot of ash? That often comes from using wood with high bark content or improper drying. Removing bark and drying wood properly can improve pellet quality significantly.
Alternative Biomass Options
Wood isn’t the only raw material you can use for pellets. Agricultural residues like corn stalks, wheat straw, and even nutshells can be turned into pellets. These alternatives can be more sustainable and sometimes cheaper, depending on your location.
However, these materials often require more processing to remove impurities and reduce ash content. They also tend to burn faster and produce more ash than wood pellets. If you want to experiment, try mixing biomass types to balance cost and performance.
- Corn stalks and wheat straw:Readily available, but watch out for ash.
- Nutshells:Dense and heat-efficient, but limited supply.
- Grass pellets:Fast-growing and renewable, but lower energy density.
What’s available in your area? Sourcing local biomass can cut costs and reduce environmental impact. Testing a small batch before making a large supply can save you headaches and help you find the best mix for your stove.
Preparing The Materials
Preparing the materials is a crucial part of making pellets for your pellet stove. The quality and consistency of your pellets depend heavily on how well you process the raw materials before pelletizing. Let’s take a closer look at the key steps that ensure your pellets burn efficiently and safely.
Chipping And Shredding
Raw materials like wood logs, branches, or agricultural residues are often too large and uneven for pellet machines to handle directly. Chipping breaks these bulky pieces into smaller, manageable chips, while shredding further reduces them into finer particles. This size reduction is essential because uniform particle size helps pellets compress tightly and burn evenly.
Have you noticed how uneven chips create gaps in pellets, causing them to crumble or burn too fast? Using a good chipper or shredder helps you avoid that. If you don’t have industrial equipment, even a sturdy garden shredder can do the job for small batches.
Drying The Raw Material
Moisture content is one of the most overlooked factors in pellet making. Too much moisture can cause pellets to fall apart or produce smoke; too little makes pelletizing difficult. Ideally, raw materials should have moisture levels between 10% and 15%.
Drying can be done naturally by spreading materials under the sun or using mechanical dryers for faster results. Have you ever tried pressing wet sawdust only to find it turning into a soggy mess? Proper drying prevents that frustration and guarantees that your pellets hold their shape and burn cleanly.
Grinding Process
The grinding process is a key step in making pellets for a pellet stove. It breaks down raw materials into smaller pieces. This makes it easier to compress them into dense pellets. Proper grinding improves pellet quality and burning efficiency. It also reduces waste and machine wear.
Selecting The Right Grinder
Choosing the right grinder depends on the material type and moisture content. Hammer mills work well with dry, hard materials. They crush the material using high-speed hammers. Ring mills are better for softer or fibrous materials. They use a rotating ring to grind gently.
Consider capacity and maintenance needs. A grinder with adjustable settings helps control particle size. Look for durable parts to handle tough materials.
Achieving Consistent Particle Size
Consistent particle size is vital for good pellet quality. Uniform particles compress evenly and hold shape. Use screens or sieves to filter out large chunks. Adjust the grinder’s speed and feed rate to get steady results.
Test the ground material regularly. Fine particles that are too small can cause dust. Large pieces may not bind well. Aim for a balance that suits your pellet stove’s requirements.
Pelletizing Steps
Making pellets for a pellet stove involves a clear set of pelletizing steps. These steps ensure the raw material transforms into small, dense pellets that burn efficiently. The process can be done using machines or by hand, depending on your resources and needs.
Using A Pellet Mill
A pellet mill is a machine designed to compress raw material into pellets. First, the raw material like sawdust or wood chips is dried to remove moisture. Too much moisture can cause poor pellet formation.
Next, the dried material is fed into the pellet mill. Inside, rollers press the material through a die with small holes. The pressure and heat cause the material to bind together and form pellets.
After pressing, the pellets come out hot and soft. They cool down and harden quickly. Then, they are ready to be stored or used in the pellet stove.
Hand-making Pellets
Hand-making pellets is possible but requires more effort. Start by grinding the raw material into a fine powder. This helps the material stick together better.
Mix the powder with a small amount of water or natural binder. The mix should be damp but not wet. Press the mixture firmly into small molds or shape it by hand.
Allow the shaped pellets to dry completely. Drying can take several hours or days depending on the environment. Once dry, the pellets become hard and ready for burning.
Cooling And Drying Pellets
Cooling and drying pellets are crucial steps in pellet production. After forming, pellets retain heat and moisture. Proper cooling and drying ensure they maintain their shape and burn efficiently. These processes prevent mold and ensure long-term storage safety.
Methods To Cool Pellets
Several methods exist for cooling pellets. The most common involves using a pellet cooler. This machine uses air to reduce pellet temperature. It's efficient and ensures even cooling. Another method is spreading pellets on a flat surface. Allow natural air to cool them. This method takes longer but is cost-effective. Lastly, some use cooling conveyors. These move pellets while cooling them with air.
Ensuring Proper Dryness
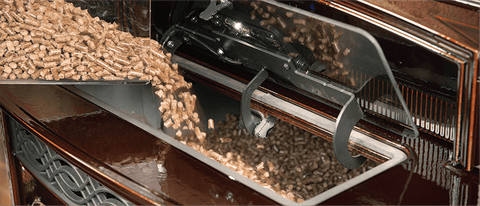
Proper dryness is vital for pellet quality. Moisture affects combustion efficiency. Check moisture levels after cooling. Use a moisture meter for accuracy. Aim for a moisture content of below 10%. Over-drying can cause pellets to crumble. Maintain a balance for optimal results. Store pellets in a dry place after drying. This prevents re-absorption of moisture.
Credit: forgenflame.com
Storing Pellets Safely
Storing pellets safely is vital to keep them dry and ready for use. Proper storage ensures pellets burn efficiently and last longer. Poor storage can cause pellets to absorb moisture and lose their quality. This section covers how to store pellets in the best way.
Ideal Storage Conditions
Pellets need a cool, dry place for storage. A storage area with good air circulation helps keep pellets fresh. Avoid direct sunlight and heat sources. Store pellets off the ground on pallets or shelves. Keep them in sealed containers or original bags to prevent dust and dirt.
- Choose a spot away from damp walls or floors.
- Maintain a stable temperature below 75°F (24°C).
- Keep pellets in a dark or shaded area.
- Use airtight bins or plastic containers for extra protection.
Avoiding Moisture And Mold
Moisture damages pellets and leads to mold growth. Moldy pellets can clog your stove and reduce heat output. Always check the storage area for signs of leaks or dampness. Use moisture absorbers like silica gel packs in storage containers. Keep pellets dry during transportation too.
- Never store pellets outside without protection.
- Inspect bags for tears or holes before storing.
- Store pellets away from water sources and plumbing.
- Allow air to circulate but avoid humid places.
Tips For Efficient Pellet Production
Producing pellets efficiently for your pellet stove means paying close attention to the details that keep the process smooth and the end product reliable. Small adjustments can make a big difference in how well the pellets burn and how long your equipment lasts. Let’s look at some practical tips that help maintain efficiency and ensure quality in your pellet production.
Maintaining Equipment
Regular maintenance of your pellet-making equipment prevents unexpected breakdowns. Clean the pellet mill and feed system frequently to avoid buildup of dust and residue that can clog machinery.
Check moving parts like rollers and dies for wear and replace them before they cause damage or reduce pellet quality. Lubricate bearings and gears to keep everything running smoothly and quietly.
Have you noticed a drop in pellet consistency? It might be time to inspect the machine settings and recalibrate pressure and temperature controls. Keeping your equipment in peak condition saves time and reduces waste.
Quality Control Checks
Regular quality checks help you catch problems early. Test pellet size and density to ensure they meet the stove manufacturer’s recommendations for optimal burning.
Pay attention to moisture content; pellets that are too wet or too dry won’t burn efficiently. Use a moisture meter frequently and adjust drying times accordingly.
Conduct visual inspections for cracks or uneven shapes. Such defects can cause feeding issues or poor combustion in your stove.
- Test batches from different raw materials to find the best mix.
- Keep a log of quality results to track patterns over time.
- Adjust the pellet recipe based on performance feedback.
Would you be surprised how much better your pellets can perform just by tightening your quality control routine? It’s the little details that make your pellets work better and last longer in your stove.

Credit: m.youtube.com

Credit: fabon.in
Frequently Asked Questions
What Materials Are Used To Make Pellets For Stoves?
Pellets are made from compressed sawdust, wood shavings, and agricultural waste. These materials are dry, clean, and free from chemicals to ensure efficient burning and minimal ash production.
How Do You Compress Raw Materials Into Pellets?
Raw materials are ground into fine particles, then dried to reduce moisture. They are compressed under high pressure using a pellet mill, which binds them into dense, uniform pellets without additives.
Can I Make Pellets For My Stove At Home?
Yes, with the right equipment like a pellet mill and dryer, you can make pellets at home. However, it requires time, effort, and proper safety measures to ensure quality and consistency.
Why Is Moisture Content Important In Pellet Making?
Ideal moisture content (around 10%) ensures pellets burn efficiently without excess smoke or ash. Too much moisture weakens pellets, while too little can cause dust and poor combustion.
Conclusion
Making pellets for a pellet stove takes simple steps. Start with dry, clean wood or sawdust. Press the material tightly into small pellets using a pellet mill. Let the pellets dry well before use. Good pellets burn better and last longer.
You save money by making your own pellets at home. It also helps reduce waste and supports a greener environment. Try making pellets carefully for a warm, cozy home this winter. Small effort, big comfort.