How Do You Make a Chocolate Milkshake in a Blender: Easy Steps

Craving a delicious chocolate milkshake but don’t want to leave your home? You’re just a few simple steps away from making a rich, creamy treat that tastes like it came from your favorite café.

Imagine the smooth blend of chocolate, ice cream, and milk coming together perfectly in your blender—ready to satisfy your sweet tooth in minutes. Keep reading, and you’ll discover exactly how to create this classic drink easily, using ingredients you probably already have.

Get ready to impress yourself and anyone you share it with!

Ingredients Needed

Before you blend your chocolate milkshake, gathering the right ingredients is key to getting that perfect creamy and chocolatey taste. Each component plays a role in the final flavor and texture, so choosing wisely will make your shake stand out. Let’s break down what you really need to make a delicious chocolate milkshake at home.

Milk And Ice Cream Choices

Your milk choice affects the creaminess and richness of the shake. Whole milk will give you a thicker, creamier texture, while skim or almond milk creates a lighter version. I usually stick with whole milk because it balances well with the ice cream.

Ice cream is the backbone of your milkshake. Classic vanilla ice cream works perfectly to let the chocolate flavor shine through, but chocolate ice cream adds an extra punch. Don’t hesitate to experiment—sometimes a scoop of coffee or caramel ice cream can surprise you with a new twist.

Selecting Chocolate Syrup

The chocolate syrup is what transforms a simple shake into a chocolate lover’s dream. Look for syrups with real cocoa for a rich, deep flavor. Some syrups are too sweet or artificial-tasting, so I recommend tasting a few brands to find your favorite.

Want a more intense chocolate hit? Try adding a spoonful of cocoa powder along with the syrup. It’s an easy trick that amps up the chocolate without extra sweetness.

Optional Add-ins

Think about what extras you want to include to personalize your shake. Whipped cream on top is a classic, but adding crushed cookies, nuts, or even a pinch of cinnamon can add texture and surprise your taste buds.

Sometimes, I add a splash of espresso to give my milkshake a mocha twist—it wakes up the chocolate flavor in a new way. What unique add-ins do you enjoy in your milkshakes?

Choosing The Right Blender

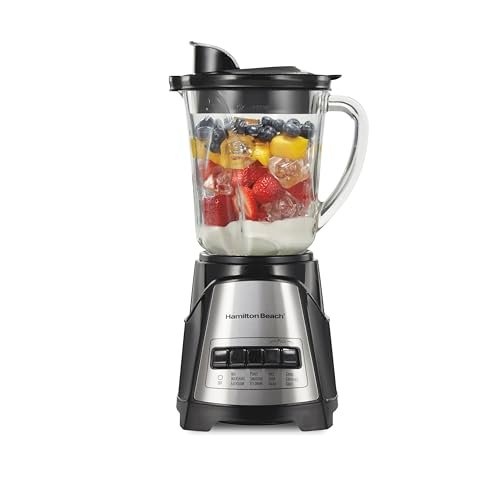
Choosing the right blender is key to making a smooth chocolate milkshake. The blender you pick affects the texture and taste. A good blender mixes ingredients well and saves time. It also makes cleaning up easier. Knowing the types of blenders and their features helps you pick the best one.

Blender Types

Blenders come in several types. Each has unique features. Here are the common ones:

  • Countertop Blenders:Best for thick shakes and large batches. They have powerful motors and big jars.
  • Immersion Blenders:Handy for quick blending in small containers. Less powerful but easy to use.
  • Personal Blenders:Perfect for single servings. Compact and easy to clean.

For chocolate milkshakes, countertop blenders work best. They crush ice and blend ice cream smoothly.

Power And Speed Settings

Power matters in blending thick ingredients like ice cream. Look for blenders with at least 500 watts. Higher power means smoother shakes faster.

Speed settings help control blending texture. Multiple speeds let you start slow and increase speed gradually. Pulse mode is useful for quick bursts of blending.

A blender with variable speeds gives better control over your milkshake’s consistency.

Step-by-step Preparation

Making a chocolate milkshake in a blender is simple and fun. It only takes a few ingredients and minutes. Follow the steps carefully to get a creamy and delicious shake every time.

Measuring Ingredients

Start by gathering your ingredients. Use fresh milk, chocolate syrup, and ice cream. Measure each ingredient for the best flavor and texture. For example:

  • 1 cup of milk
  • 2 tablespoons of chocolate syrup
  • 2 large scoops of vanilla or chocolate ice cream

Accurate measuring ensures a balanced taste and smooth blend.

Blending Process

Place all ingredients into the blender jar. Secure the lid tightly. Blend on medium speed for about 30 seconds. Watch the mixture turn smooth and creamy. Stop the blender and check the shake’s texture. If needed, blend for another 10 to 15 seconds.

Adjusting Consistency

Check the thickness of your milkshake. If it is too thick, add a little milk. Blend again for a few seconds. If the shake is too thin, add more ice cream or a few ice cubes. Blend until the shake reaches your desired consistency. Serve immediately for the best taste.

How Do You Make a Chocolate Milkshake in a Blender: Easy & Delicious Steps

Credit: www.sobeys.com

Serving Suggestions

Serving your chocolate milkshake right can turn a simple treat into an unforgettable experience. The way you present it affects not only the taste but also how much you enjoy it. Paying attention to details like glassware and toppings can make all the difference.

Glassware Options

Choosing the right glass can elevate your milkshake instantly. Tall, clear glasses show off the rich, creamy texture, making it visually appealing. If you want a retro vibe, use a classic soda fountain glass or a mason jar for a cozy, homemade feel.

Consider the size and thickness of the glass too. A wide mouth is perfect for adding toppings or enjoying with a thick straw. You can even chill your glass in the freezer before pouring the milkshake, keeping it cold longer and more refreshing.

Toppings And Garnishes

Toppings add flavor, texture, and fun to your chocolate milkshake. Whipped cream is a classic choice, adding lightness that balances the richness of the chocolate. Sprinkle some chocolate shavings, crushed nuts, or mini marshmallows on top for an extra treat.

Want to surprise your guests? Add a drizzle of caramel or a splash of espresso. A cherry or a cookie on the rim can make your milkshake Instagram-worthy. How do you like to customize your chocolate milkshake to make it truly yours?

Tips For Perfect Milkshake

Blend milk, chocolate syrup, and ice cream until smooth for a creamy chocolate milkshake. Use cold ingredients for a thick, rich taste. Adjust sweetness and texture by adding more syrup or milk as needed.

Creating the perfect chocolate milkshake in a blender can be a delightful experience, but it takes a bit of finesse to get it just right. Whether you're a milkshake novice or a seasoned pro, there are a few tips and tricks that can elevate your homemade shake to creamy perfection. Let's explore some handy tips to ensure your chocolate milkshake is consistently delicious and utterly satisfying. Start by chilling your blender jar in the freezer for a few minutes before use. This helps in maintaining the cold temperature of the ingredients, ensuring a thick and creamy consistency. Use high-quality chocolate ice cream as the base. The better the ice cream, the richer the shake. If you're feeling adventurous, try experimenting with different chocolate flavors like dark chocolate or chocolate fudge.

Enhancing Flavor

Add a pinch of salt to balance the sweetness and enhance the chocolate flavor. You'd be surprised how a tiny bit of salt can take your milkshake to the next level. Consider adding a splash of vanilla extract or a dollop of whipped cream for an extra layer of flavor. These additions can introduce a delightful complexity to your shake. If you like a bit of crunch, toss in some chocolate chips or crushed cookies. They add texture and a burst of extra chocolate goodness with every sip.

Avoiding Common Mistakes

Be cautious with the milk quantity. Too much milk can make your shake runny, while too little can make it too thick. Start with a small amount and gradually add more until you reach the desired consistency. Avoid over-blending the milkshake. Over-blending can cause the ice cream to melt too much, resulting in a watery shake. Blend just enough to combine the ingredients smoothly. Remember, achieving the ideal milkshake is about balance. Have you ever wondered why some shakes just don't hit the mark? It often comes down to these subtle tweaks and choices. Experiment with these tips and find the perfect blend that suits your taste!

How Do You Make a Chocolate Milkshake in a Blender: Easy & Delicious Steps

Credit: www.tuckinbites.com

Variations To Try

Experimenting with your chocolate milkshake can turn a simple treat into a delightful experience. Trying out different variations lets you discover new flavors and textures that suit your taste perfectly. Let’s look at some easy ways to switch up your classic chocolate milkshake right in your blender.

Adding Fruits

Adding fruits to your chocolate milkshake can brighten up the flavor and give it a fresh twist. Bananas are a popular choice because they add natural sweetness and creaminess without overpowering the chocolate. Berries like strawberries or raspberries introduce a tart contrast that makes each sip more interesting.

Try blending your milkshake with frozen fruit to keep it thick and cold without needing extra ice. Have you ever thought about mixing in avocado? It adds smoothness and a boost of healthy fats without changing the taste much.

Using Different Chocolate Types

Switching the type of chocolate you use can dramatically change your milkshake’s flavor profile. Dark chocolate gives a richer, more intense taste, while milk chocolate keeps it sweeter and creamier. White chocolate, on the other hand, offers a smooth, buttery flavor that pairs surprisingly well with a pinch of salt or vanilla extract.

Consider using chocolate syrups, cocoa powder, or even chocolate chips to vary the texture and intensity. Which chocolate flavor excites your taste buds the most?

Making It Vegan

You don’t have to miss out on a chocolate milkshake if you follow a vegan diet. Simply swap dairy milk for almond, oat, or soy milk, which blend smoothly and add their own subtle flavors. Use dairy-free ice cream or frozen bananas to keep the shake creamy.

Look for vegan chocolate or cocoa powder to make sure every ingredient fits your lifestyle. Have you tried a vegan chocolate milkshake that surprised you with how rich and satisfying it was?

How Do You Make a Chocolate Milkshake in a Blender: Easy & Delicious Steps

Credit: houseofnasheats.com

Frequently Asked Questions

How Long Does It Take To Make A Chocolate Milkshake?

Making a chocolate milkshake in a blender takes about 3 to 5 minutes. This includes gathering ingredients, blending, and serving. It’s a quick and simple process ideal for satisfying sudden cravings.

What Ingredients Are Needed For A Chocolate Milkshake?

You need chocolate ice cream, milk, and chocolate syrup. Optional additions include whipped cream, vanilla extract, or ice cubes. Fresh ingredients ensure a rich and creamy milkshake.

Can I Use Different Types Of Milk For The Milkshake?

Yes, you can use whole, skim, almond, or oat milk. Each type affects flavor and texture slightly. Choose based on preference or dietary needs for the best results.

How To Make A Chocolate Milkshake Thicker?

Add more ice cream or less milk for thickness. You can also include ice cubes or frozen banana pieces. Blend until smooth and creamy for the perfect texture.

Conclusion

Making a chocolate milkshake in a blender is quick and fun. Just add milk, chocolate syrup, and ice cream. Blend until smooth and creamy. You can adjust the sweetness or thickness any way you like. This simple recipe works great for any time of day.

Enjoy a tasty treat that feels like a small celebration. Try it yourself and taste the difference. Easy to make, easy to enjoy. Perfect for hot days or when you want a sweet snack.

Share Post:

Categories

Related Post

If you’re looking for a quick, comforting meal that’s both tasty and easy to make, tuna casserole with cream of mus...
Are you thinking about renting a storage container but unsure how much it will cost? You’re not alone.Whether you n...
Poaching an egg can seem tricky, but it doesn’t have to be. If you’ve ever struggled with eggs breaking apart or st...