Thinking about switching your natural gas grill to propane? You’re not alone.
Many grill owners want the freedom and convenience that propane offers. But the question is, how do you make the change safely and effectively? If you’ve ever felt unsure or overwhelmed by the process, this guide is for you. By the end, you’ll know exactly what steps to take to convert your grill and enjoy cooking outdoors without hassle.
Ready to make your grilling experience easier and more flexible? Let’s dive in.

Credit: blackstoneproducts.com
Check Grill Compatibility
Before you start converting your natural gas grill to propane, it's crucial to check if your grill is compatible with the conversion process. Not all grills are designed to work with both fuel types, and attempting to convert an incompatible grill can lead to safety hazards or poor performance. Taking the time to verify compatibility saves you from costly mistakes and ensures a smooth grilling experience.
Identify Model And Manufacturer
Begin by locating the model number and manufacturer information of your grill. This information is usually found on a sticker or metal plate on the back or inside the cabinet of the grill. Knowing the exact model helps you find the correct conversion kit and instructions tailored for your specific grill.
If you’ve ever tried to convert a grill without this information, you know how frustrating it can be to guess which parts fit. It’s like trying to solve a puzzle without all the pieces. Don’t skip this step—your safety depends on it.
Verify Conversion Possibility
Once you have the model and manufacturer details, check if your grill supports conversion from natural gas to propane. Visit the manufacturer’s website or contact their customer service to confirm. Some grills come with a conversion kit included or offer one for purchase.
Look for key details such as:
- Manufacturer’s official conversion guidelines
- Availability of a propane conversion kit
- Recommended procedures and warnings
If the manufacturer does not support conversion, it’s best not to attempt it yourself. Improper conversion can cause leaks, uneven flames, or even dangerous gas build-ups. Have you ever wondered why some grills burn hotter with propane? It’s all about the design and compatibility.
Gather Required Tools And Parts
Gathering the right tools and parts is the first key step to convert your natural gas grill to propane. Having everything ready saves time and prevents frustration during the process. It also ensures safety and proper function after conversion.
Knowing what you need helps you avoid extra trips to the store. The right parts fit your grill perfectly. The correct tools make the job easier and faster. Let's explore the main components and tools required for this conversion.
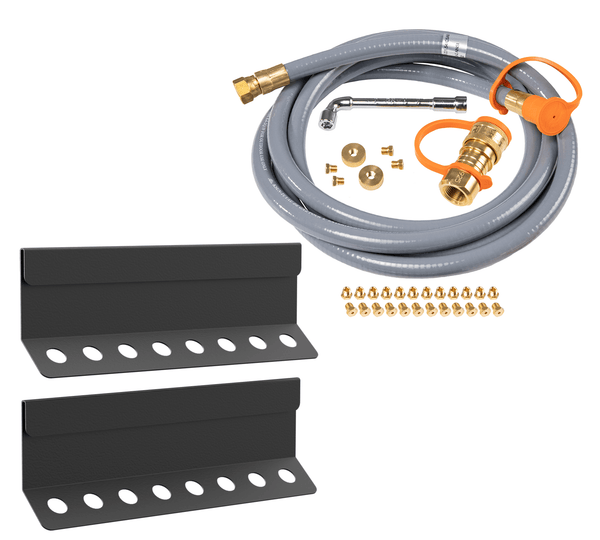
Propane Conversion Kit Components
The propane conversion kit contains parts designed for safe switch from natural gas to propane. These parts adjust gas flow and pressure to suit propane tanks.
- Propane regulator to control gas pressure
- Orifices sized for propane burners
- Hoses compatible with propane fittings
- Adapter fittings for hose connections
- Instruction manual specific to your grill model
Ensure the kit matches your grill brand and model. Using the wrong parts can cause leaks or poor performance.
Necessary Tools List
Having the right tools helps you complete the conversion cleanly and safely. Prepare these before starting the work.
- Adjustable wrench for loosening and tightening fittings
- Screwdrivers, both flathead and Phillips
- Pipe thread sealant rated for propane connections
- Leak detection solution or soapy water
- Work gloves to protect your hands
- Flashlight for better visibility inside the grill
Check each tool for good condition. Damaged tools can make the job harder or unsafe.
Turn Off And Disconnect Gas Supply
Turning off and disconnecting the gas supply is the first and most important step in converting a natural gas grill to propane. This step ensures no gas flows while you work, preventing accidents. Properly shutting off and disconnecting the gas helps protect you and your home.
Always take your time and handle the gas lines carefully. Follow safety rules to avoid leaks or damage. This part of the process sets the stage for a smooth and safe conversion.
Shut Off Natural Gas Valve
Locate the natural gas valve connected to your grill. It usually sits near the grill or where the gas line enters your home. Turn the valve clockwise to close it fully. This stops the flow of natural gas to the grill.
Double-check that the valve is closed tight. No gas should come out after this. If you smell gas, do not continue. Call a professional for help immediately.
Ensure Safety Precautions
Before disconnecting the gas line, make sure no open flames or sparks are nearby. Work in a well-ventilated area to avoid gas buildup. Wear gloves to protect your hands from sharp fittings or debris.
Have a fire extinguisher close by, just in case. After turning off the valve, release any gas pressure by slowly loosening the connection. Only disconnect the gas line once you are sure no gas remains in the line.
Remove Natural Gas Components
Remove natural gas components carefully to convert your grill. Replace them with compatible propane parts for safety. Make sure to check all connections thoroughly to prevent leaks.
Converting a natural gas grill to propane involves careful steps. The first step is to remove the natural gas components. This ensures the grill is ready for propane use. Follow these steps for a smooth conversion.
Detach Regulator And Hose
Start by turning off the gas supply. This is crucial for safety. Unscrew the regulator from the gas line. Use a wrench for a tight connection. Detach the hose from the grill. Check for any wear or damage. Replace if necessary. Keep these parts aside, as they are not needed for propane.
Remove Orifice And Burner Parts
Locate the orifice on your grill. It controls the gas flow. Use a screwdriver to remove it. Be gentle to avoid damage. Next, take out the burner parts. Check for any residue or blockages. Clean them before reassembly. This ensures an efficient propane flow. Remember, propane and natural gas orifices differ. Install the correct one for propane.
Install Propane Parts
Installing propane parts is a crucial part of converting your natural gas grill to propane. This process ensures your grill runs safely and efficiently with propane. Missing any step can lead to leaks or poor performance, so pay close attention as you proceed.
Attach New Orifice
The orifice controls how much gas flows to your burners. Natural gas orifices are larger than propane ones because propane needs less gas volume at higher pressure.
Remove the existing orifice using a wrench. Then, screw in the new propane orifice tightly but avoid overtightening to prevent damage.
Think about how much gas your grill needs and confirm the orifice size matches your grill’s specifications. Using the wrong size can cause uneven flames or safety hazards.
Connect Propane Regulator And Hose
The propane regulator controls the gas pressure from the tank to your grill. Without it, you risk unsafe pressure levels.
First, disconnect the natural gas line completely. Attach the propane hose to the new orifice and then connect the regulator to the hose.
Make sure all connections are snug and secure. Test for leaks by applying soapy water to the connections and watching for bubbles when the gas is turned on. Have you ever thought about how a tiny leak can turn a fun cookout into a dangerous situation?
Test For Gas Leaks
Testing for gas leaks is a crucial safety step when converting your natural gas grill to propane. Even a small leak can be dangerous, so you need a reliable way to check every connection and joint. This process is simple and effective, helping you cook with confidence.
Apply Soapy Water Solution
Mix a small amount of dish soap with water in a spray bottle or bowl. You want enough soap to create bubbles easily but not so much that the solution becomes too thick. Apply this soapy water generously to all the gas connections, valves, and fittings on your grill.
Don’t rush this step. Make sure the solution covers every joint and hose where leaks could appear. The soap will react with escaping gas, making it visible through bubbles.
Check For Bubble Formation
After applying the soapy water, turn on the propane supply slowly without lighting the grill. Watch carefully for any bubbles forming on the surfaces where you applied the solution. Bubbles indicate escaping gas, signaling a leak that needs immediate attention.
If you spot bubbles, tighten the connections and reapply the soapy water. Repeat the test until no bubbles appear. Have you ever ignored a tiny leak, only to regret it later? This test saves you from that risk.
Adjust Grill Settings
Adjusting your grill settings after converting from natural gas to propane is crucial for safe and efficient cooking. The two gases burn differently, so fine-tuning your grill ensures you get the right heat and flame quality. Skipping this step can lead to poor performance or even dangerous flare-ups.
Set Correct Air Shutter
The air shutter controls how much oxygen mixes with the propane before combustion. Too little air makes the flame yellow and smoky, while too much air causes it to flicker or go out. Adjust the shutter by loosening its screw and sliding it open or closed until you see a steady blue flame with small yellow tips.
Remember, each grill model may have a different shutter setup. Take your time and make small adjustments. You’ll notice better heat distribution and cleaner burning when it’s set right.
Test Flame Quality
Once the air shutter is set, ignite your grill and observe the flame closely. A good propane flame is mostly blue with a steady shape, and it shouldn’t produce excessive noise or soot. If the flame is too high or low, adjust the gas pressure regulator or burner valves accordingly.
Test by cooking something simple, like a few burgers. Notice if the heat feels even or if certain spots are hotter. This hands-on test helps you fine-tune the settings for your specific grill and propane setup.

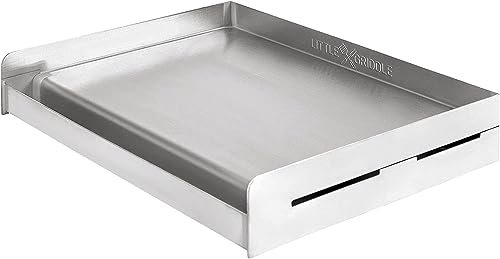
Credit: us.amazon.com
Safety Tips And Maintenance
Switching your natural gas grill to propane needs careful attention to safety and maintenance. Proper handling keeps your grill working well and prevents accidents. Follow these key safety tips to enjoy cooking without worry.
Regular Leak Checks
Check your grill for gas leaks often. Use a soap and water solution on all connections. Bubbles show a leak. Never use a flame to check leaks. Tighten or replace faulty parts immediately. Leaks can cause fires or explosions. Keep your grill in a well-ventilated area during checks.
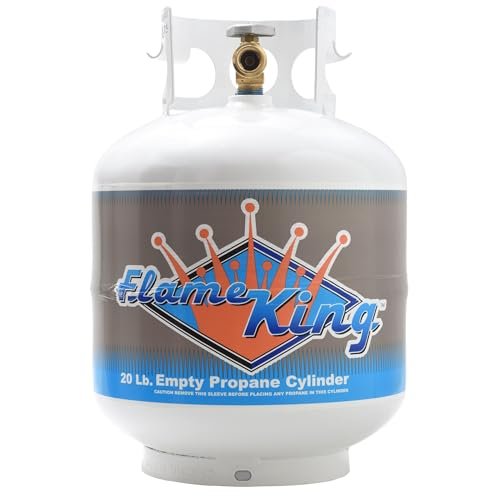
Proper Storage Of Propane Tanks
Store propane tanks upright and outside. Keep them away from heat sources and direct sunlight. Do not store tanks in basements or enclosed spaces. Always close the valve tightly when not in use. Inspect tanks for rust or damage regularly. Replace old or damaged tanks to avoid hazards.
Credit: blackstoneproducts.com
Frequently Asked Questions
How Do You Safely Convert A Natural Gas Grill To Propane?
First, turn off the gas supply and disconnect the natural gas line. Replace the orifices with propane ones. Adjust the regulator to match propane pressure. Test for leaks before use. Follow manufacturer instructions for a safe conversion.
What Tools Are Needed To Convert A Natural Gas Grill?
You will need a wrench, screwdriver, propane orifices, and a propane regulator. A leak detection solution is helpful. Always refer to the grill’s manual for specific tool requirements.
Can I Convert Any Natural Gas Grill To Propane?
Most grills can be converted, but not all. Check the manufacturer’s guidelines. Some models may require special conversion kits. Always ensure compatibility to avoid safety risks.
How Long Does It Take To Convert A Natural Gas Grill?
Conversion typically takes 30 to 60 minutes. Time varies based on grill model and user experience. Carefully follow instructions to ensure a proper and safe conversion.
Conclusion
Converting a natural gas grill to propane is simple with the right steps. Always check your grill’s manual before starting. Use proper parts made for propane use. Safety matters most—work in a well-ventilated area and check for leaks. This change gives you more flexibility and convenience.
Enjoy grilling with propane anytime you want. Keep your grill clean and maintained for best results. Now, you can cook outdoors with ease and confidence.