Is your Keurig 2.0 coffee maker not brewing as smoothly as before? You might be dealing with mineral buildup inside your machine.
Descaling your Keurig is the secret to restoring that fresh, rich coffee taste you love. But how do you do it correctly without wasting time or damaging your machine? In this guide, you’ll learn simple, step-by-step instructions to descale your Keurig 2.
0 quickly and safely. Keep reading to make every cup taste just right again.
Credit: www.espressogalerie.com
Why Descale Your Keurig 2.0
Descaling your Keurig 2.0 is a key part of keeping it working well. Over time, minerals from water build up inside the machine. This buildup can cause problems. It affects how your coffee tastes and how well the machine works. Understanding why you should descale helps you care for your coffee maker.
Effects Of Mineral Buildup
Mineral buildup clogs the water lines inside the Keurig. It slows down water flow and lowers brewing temperature. This can make your coffee taste bitter or weak. The machine may take longer to brew or stop working. Mineral deposits can also cause leaks and damage parts. Ignoring buildup shortens your Keurig’s lifespan.
Benefits Of Regular Descaling
Descaling removes mineral deposits and keeps water flowing smoothly. It ensures the machine heats water properly. This improves coffee flavor and brewing speed. Regular descaling prevents damage and costly repairs. It keeps your Keurig clean and working like new. You get fresh, hot coffee every time you brew.

Credit: www.youtube.com
What You Need To Descale
Descaling your Keurig 2.0 coffee maker keeps it running smoothly and improves coffee taste. It removes mineral build-up inside the machine. Knowing what you need before starting saves time and effort. Gather the right items for an effective descale process.
Descaling Solutions
Use a descaling solution made for coffee makers. These solutions dissolve mineral deposits safely. Most brands offer liquid or powder forms. Follow package instructions for best results. Using a proper descaler protects your machine from damage.
Alternative Ingredients
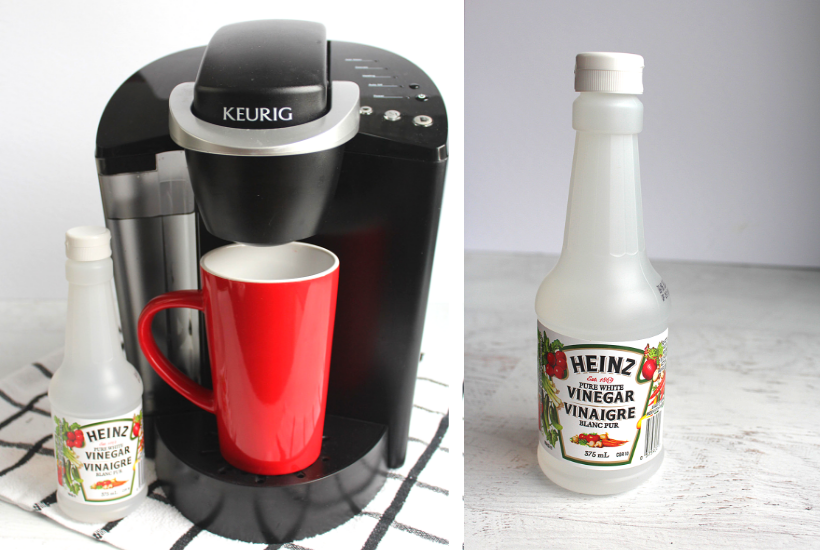
White vinegar works as a natural descaling agent. Mix equal parts of vinegar and water. This solution helps break down lime and calcium build-up. Lemon juice can also be used but is less common. Avoid harsh chemicals that can harm your coffee maker.
Tools And Supplies
- Clean, empty water reservoir
- Large ceramic mug or container
- Measuring cup for liquids
- Soft cloth or sponge for wiping
- Access to a sink for rinsing
Having these tools ready makes the process smooth. Clean water is essential for rinsing after descaling.
Preparing Your Keurig 2.0
Preparing your Keurig 2.0 is a crucial first step before you start the descaling process. Taking the time to get everything ready ensures that the descaling solution can work effectively and that your machine remains in great shape. Let’s look at what you need to do to set your coffee maker up for a successful descale.
Emptying The Water Reservoir
Begin by removing the water reservoir from your Keurig 2.0. Pour out any remaining water completely to avoid diluting the descaling solution. This step might seem simple, but skipping it can reduce the cleaning power of the solution and leave mineral deposits behind.
After emptying, rinse the reservoir with clean water. Make sure there’s no leftover debris or coffee grounds inside. This little extra care can improve the overall cleaning process and keep your coffee tasting fresh.
Removing K-cup And Accessories
Next, take out any K-Cup pods from the machine. Leaving pods inside during descaling can cause blockages or damage the brew chamber. Also, remove any accessories such as the drip tray or water filter to prevent them from getting damaged or interfering with the descaling solution.
Cleaning these parts separately is easier and more effective. Do you ever forget to remove the drip tray? It’s a common oversight that can lead to leaks or spills during the process. Removing everything ensures your machine is fully prepped and ready for the deep clean ahead.
Descaling Process Step-by-step
Keeping your Keurig 2.0 in top shape means regular descaling. Over time, mineral deposits can build up, affecting your coffee's taste and your machine's performance. Follow these simple steps to descale your Keurig 2.0 effectively.
Mixing The Descaling Solution
Start by preparing your descaling solution. Use a commercial descaling solution or a homemade mixture. For a homemade solution, combine equal parts of water and white vinegar. Fill the water reservoir with the solution.
Running The Descale Brew Cycles
Turn on your Keurig and place a large mug on the drip tray. Begin the brew cycle by selecting the largest cup size. Allow the solution to run through the machine. Repeat this process until the reservoir is empty. This ensures the solution cleans all internal parts.
Rinsing The Machine
After descaling, it's crucial to rinse your machine. Fill the reservoir with fresh water. Run multiple brew cycles without a K-cup to flush out any residue. Continue until the water is clear and free of vinegar smell. This step guarantees a fresh start for your next brew.
Post-descaling Care
After descaling your Keurig 2.0, proper care ensures the machine stays in great shape and delivers the best coffee. Skipping this step can leave behind residue or cause parts to malfunction. Taking a few extra minutes to clean and test your coffee maker will save you frustration and extend its life.
Cleaning Removable Parts
Once descaling is complete, remove the water reservoir, drip tray, and K-Cup holder. Rinse each part thoroughly with warm water to wash away any leftover vinegar or descaling solution.
Use a soft sponge or cloth to wipe down these parts gently. Avoid harsh scrubbing to prevent damage. If you notice any stubborn stains, soak the pieces in soapy water for 10 minutes before rinsing again.
Reassembling And Testing
After cleaning, carefully reassemble your Keurig 2.0. Make sure each part snaps back into place securely to avoid leaks or operational issues.
Fill the reservoir with fresh water and run a few brew cycles without a K-Cup. This flushes out any remaining descaling agent and clears the internal system.
Does your coffee taste fresh and clean now? If not, consider running an additional rinse cycle. Testing your machine this way confirms it’s ready for your next perfect cup.
Tips To Prevent Future Buildup
Preventing buildup in your Keurig 2.0 keeps your coffee fresh and machine working well. Simple habits reduce scale and prolong the brewer’s life. Consistent care saves time and avoids deep cleaning later. Focus on water quality and regular maintenance for best results.
Using Filtered Water
Tap water often contains minerals that cause scale buildup. Using filtered water lowers mineral content and slows buildup. It also improves coffee taste by reducing impurities. Consider installing a water filter or using bottled filtered water. This small change protects your machine and ensures better coffee every day.
Scheduling Regular Descaling
Set a routine to descale your Keurig every 3 to 6 months. Regular descaling removes early mineral deposits before they harden. Mark your calendar or set phone reminders for this task. Frequent descaling keeps the machine running smoothly and avoids costly repairs. It also helps maintain consistent brewing temperature and flavor.

Credit: www.youtube.com
Frequently Asked Questions
How Often Should I Descale My Keurig 2.0?
Descale your Keurig 2. 0 every 3 to 6 months. This prevents mineral buildup and ensures better coffee taste. Frequency depends on water hardness and usage. Regular descaling maintains machine efficiency and extends its lifespan.
What Descaling Solution Is Safe For Keurig 2.0?
Use Keurig’s official descaling solution or white vinegar. Both effectively remove mineral deposits without harming the machine. Avoid harsh chemicals as they may damage internal parts or affect coffee flavor.
Can I Use Vinegar To Descale My Keurig 2.0?
Yes, white vinegar is a natural and effective descaling agent. Mix it with water and run the descale cycle. Rinse the machine thoroughly afterward to remove any vinegar taste.
How Long Does The Descaling Process Take?
Descaling a Keurig 2. 0 usually takes about 30 to 45 minutes. It involves running the descaling solution through the machine and rinsing. Following instructions precisely ensures thorough cleaning and optimal machine performance.
Conclusion
Descaling your Keurig 2. 0 keeps it working well and tasting fresh. Regular cleaning stops clogs and extends your machine’s life. Use the right descaling solution and follow clear steps carefully. It only takes a little time but saves you from big problems later.
Keep your coffee strong and smooth by cleaning often. Enjoy every cup without worrying about buildup or damage. Simple care makes your Keurig last longer and brew better every day.