Are you thinking about switching your natural gas stove to propane but aren’t sure where to start? Converting your stove might seem tricky at first, but with the right steps, you can do it safely and easily.
This guide will walk you through everything you need to know, helping you save money and enjoy the flexibility propane offers. Keep reading, and you’ll discover how simple the conversion can be—plus expert tips to avoid common mistakes. Your kitchen upgrade is closer than you think!
Check Stove Compatibility
Before converting a natural gas stove to propane, checking the stove’s compatibility is essential. Not all stoves can safely or effectively switch fuel types. Confirming compatibility helps avoid damage and ensures safe operation. This step saves time and prevents costly mistakes.
Identify Stove Model
Find the stove’s model number. Usually, this number is on a label inside the oven door or on the back of the stove. Write down the model number for reference. This information helps in finding the right conversion kit. It also allows checking if the stove supports propane use.
Review Manufacturer Guidelines
Read the stove’s user manual or manufacturer website. Look for any mention of fuel conversion. Some stoves have specific parts or kits approved for propane conversion. Follow the manufacturer’s instructions strictly. Using incorrect parts can cause leaks or poor stove performance.
Gather Required Tools And Materials
Before you start converting your natural gas stove to propane, it's crucial to gather all the necessary tools and materials. Having everything ready not only saves time but also ensures the process goes smoothly without unexpected interruptions. Missing a single component can lead to frustration or even safety risks.
Conversion Kit Components
Your conversion kit is the heart of the project. It typically includes new orifices, a regulator, and detailed instructions tailored to your stove model. These orifices control the gas flow, which differs between natural gas and propane, so using the correct ones is vital.
Sometimes, kits also come with replacement tubing or connectors. Check the kit contents carefully against your stove manual to confirm compatibility. Have you ever started a project only to realize you needed a part halfway through? Avoid that by double-checking now.
Safety Equipment
Working with gas appliances demands strict safety precautions. You should have a gas leak detector or a soapy water solution ready to check for leaks after installation. A good-quality adjustable wrench and screwdrivers will help you handle fittings securely without damaging components.
Don't forget protective gloves and safety glasses. These protect you from sharp edges and accidental gas exposure. Being prepared with safety gear is not just smart—it’s essential for your peace of mind during the conversion.
Turn Off Gas Supply
Before you start converting your natural gas stove to propane, turning off the gas supply is essential. This step ensures your safety and prevents any leaks or accidents. Knowing exactly how to stop the gas flow will give you confidence as you move forward with the conversion.
Locate Gas Valve
First, find the main gas valve connected to your stove. It’s usually located behind the stove or under the countertop. Sometimes, it looks like a small knob or lever attached to the gas pipe.
Take your time to identify the valve clearly. If you’re unsure, trace the gas line from the stove back to where it connects to the wall or floor. This will help you avoid turning off the wrong valve and interrupting gas supply to other appliances.
Ensure Complete Shutoff
Once you’ve found the valve, turn it clockwise to close it. This action stops the gas from flowing to your stove. Don’t just close it halfway — make sure it’s fully turned off.
After shutting off the valve, double-check by trying to light a burner. If no flame appears, the gas is off. This simple check prevents surprises and keeps you safe during the conversion process.
Remove Burner Components
Converting a natural gas stove to propane is a practical task. The first step is to remove the burner components. This process involves handling different parts of the stove. You need to be careful and attentive. Let's break this down into manageable steps.
Detach Grates And Burner Caps
Begin by removing the stove grates. These metal frames sit over the burners. Simply lift them off the stove. Then, focus on the burner caps. These are the round, flat pieces on top of the burners. They are easy to remove. Just lift them off gently. Keep all parts organized and safe for reassembly.
Unscrew Burner Assemblies
Next, unscrew the burner assemblies. These are the metal parts under the caps. Use a screwdriver to remove the screws. Keep the screws in a safe spot. Gently lift the burner assemblies off the stove. This exposes the gas orifices. Ensure the parts are clean and undamaged. Proper handling is important for successful conversion.
Install Propane Orifices
Installing propane orifices is a key step when converting your natural gas stove to propane. These small components control the flow of gas to the burners, so using the correct orifices ensures your stove runs safely and efficiently on propane. Ignoring this could lead to poor performance or even dangerous situations.
Replace Natural Gas Orifices
Natural gas orifices are larger because natural gas burns at a lower pressure than propane. To switch to propane, you must replace these with smaller orifices designed specifically for propane use.
Check your stove’s manual or contact the manufacturer to get the exact orifice sizes needed. Using the wrong size can cause flames to be too large or too small, affecting cooking quality and safety.
Keep the old orifices in case you want to switch back. Having the correct replacement orifices ready saves time and frustration during the conversion.
Secure Orifices Properly
After replacing, make sure the orifices are tightly secured. Loose orifices can cause gas leaks, which are a serious hazard.
Use a wrench to gently tighten them without overdoing it—too much force might damage the fittings. Double-check the connections by applying a soapy water solution; bubbles indicate leaks that need fixing.
Have you ever considered how a small part like an orifice can impact your entire cooking experience? Taking time to secure these properly protects both your home and your peace of mind.

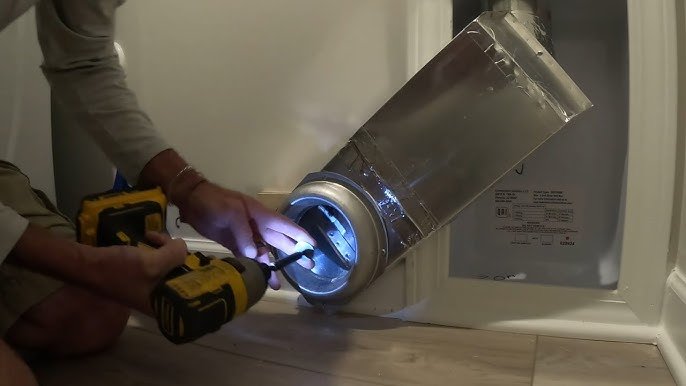
Credit: www.youtube.com
Adjust Regulator Settings
Adjusting the regulator settings is a crucial step when converting your natural gas stove to propane. The regulator controls the gas pressure reaching your stove’s burners, and propane requires a different pressure setting than natural gas. If you skip this adjustment, your stove may not operate safely or efficiently.
Locate Gas Regulator
The gas regulator is usually found near the gas supply line behind or under your stove. It looks like a small round or oval device connected to a pipe or hose. Sometimes, it’s hidden under a panel or behind the stove, so you might need a flashlight to spot it.
Before you touch anything, make sure to turn off the gas supply. Safety always comes first. Have you checked if your stove’s manual shows exactly where the regulator is? It can save you time and frustration.
Switch To Propane Mode
Most natural gas stoves come with a regulator that can switch between natural gas and propane settings. Look for a small lever, dial, or screw on the regulator labeled for each gas type. You’ll need to move this control to the propane position.
If your regulator doesn’t have a switch, you might have to replace it with one designed specifically for propane. This is a critical detail many overlook, but using the wrong regulator can cause dangerous gas pressure.
Once you switch to propane mode, double-check all connections for leaks. A simple soapy water test can help you spot bubbles where gas might escape. Have you ever thought about how much a small adjustment like this affects your stove’s performance?
Reassemble Stove Parts
After switching the gas supply from natural gas to propane, putting your stove back together correctly is crucial for safety and performance. Reassembling stove parts requires attention to detail to ensure everything fits and functions as it should. Missing or misplacing a small piece can lead to uneven flames or inefficient cooking.
Reattach Burners And Caps
Start by carefully placing the burners back onto their bases. Each burner fits into a specific slot, so make sure it sits flat and stable. Misaligned burners can cause flame irregularities or even gas leaks.
Next, put the burner caps on top. These caps distribute the flame evenly, so they must be secure and clean. If you notice any wear or damage on the caps, consider replacing them before proceeding.
Replace Grates
Once the burners and caps are in place, it's time to set the grates back. Grates provide the support for your pots and pans, so they need to be stable and level.
Check for any warping or damage on the grates that could cause instability. If your old grates don’t fit well after conversion, look for replacement grates designed for propane stoves.
Test For Gas Leaks
Testing for gas leaks is a crucial safety step after converting a natural gas stove to propane. Even small leaks can cause dangerous situations. Carefully checking your connections prevents accidents and ensures your stove works properly. Always test in a well-ventilated area and never skip this step.
Apply Soapy Water Solution
Mix water and liquid soap to create a soapy water solution. Use a spray bottle or a brush to apply the solution to all gas connections and joints. Cover every area where gas could escape, including the regulator and hose fittings. The soap solution helps reveal leaks by creating bubbles.
Check For Bubbling
Watch each soapy area closely after applying the solution. Look for small bubbles forming on the surface. Bubbling means gas is escaping from that spot. If bubbles appear, turn off the gas immediately. Tighten the connections and test again. Repeat until no bubbles form, ensuring the stove is safe to use.
Light Burners And Adjust Flame
Light burners must be changed to match propane’s pressure and flow. Adjusting the flame ensures safe, efficient cooking after conversion. Proper tuning prevents yellow flames and keeps the stove working well.
Once you've successfully converted your natural gas stove to propane, the next essential step is to light the burners and adjust the flame. This is where you ensure that the conversion was done correctly and that your stove is functioning safely and efficiently. Getting the flame just right not only ensures optimal cooking performance but also prolongs the life of your stove.
Ignite Each Burner
Begin by turning the burner knob to the ignition position. Listen for the familiar clicking sound which indicates that the igniter is working. If the burner lights up swiftly with a steady blue flame, you’re on the right track. Ensure to light each burner individually. This helps in confirming that every part of the stove has been correctly adjusted for propane use. If a burner doesn't light up or the flame is inconsistent, double-check the orifice size and the connection.
Fine-tune Flame Height
Once all burners are lit, it’s time to focus on the flame height. A properly adjusted flame should be predominantly blue with a small, steady cone. Use the burner control knobs to adjust the flame. If the flame is yellow or too high, it may indicate a problem with air mixing or an incorrect orifice size. You might need to make small adjustments to the air shutter or consult the stove’s manual for further guidance. Have you ever noticed how a flame that's too high can scorch your favorite pot? Ensuring the perfect flame height not only protects your cookware but also enhances your cooking experience. Remember, the right flame makes all the difference in achieving that perfect sear or simmer. By being meticulous in this process, you ensure both safety and the satisfaction of a perfectly cooked meal every time.

Credit: www.amazon.ca
Safety Tips And Best Practices
Converting a natural gas stove to propane requires careful attention to safety. Using propane safely means following important tips and best practices. These help prevent leaks, fires, and other hazards. Proper safety measures protect your home and family.
Ventilation Importance
Good ventilation is essential when using propane. It removes harmful gases from your kitchen. Open windows or use exhaust fans to keep air flowing. Never block vents or air pathways. Proper ventilation reduces the risk of carbon monoxide buildup.
Regular Maintenance
Keep your stove in good condition with regular checks. Inspect hoses and connections for leaks or damage. Clean burners to ensure even flames and efficient burning. Schedule professional inspections at least once a year. Regular maintenance keeps your propane stove safe and working well.

Credit: www.amazon.ca
Frequently Asked Questions
How Do I Convert A Natural Gas Stove To Propane?
To convert, replace the natural gas orifices with propane orifices. Adjust the regulator and check for leaks. Always follow the manufacturer’s conversion kit instructions for safety and efficiency.
What Tools Are Needed To Convert A Gas Stove To Propane?
You need a propane conversion kit, a wrench, screwdriver, and a leak detection solution. A flashlight helps for better visibility. These tools ensure a safe and proper conversion process.
Can I Convert My Stove Without Professional Help?
Yes, if you follow the stove manufacturer’s instructions carefully. However, hiring a certified technician is safer and ensures correct installation. Improper conversion can cause gas leaks or stove damage.
How Long Does Propane Conversion Take On A Gas Stove?
The conversion typically takes 30 minutes to an hour. Time depends on your experience and stove model. Proper adjustment and leak testing are essential and should not be rushed.
Conclusion
Converting a natural gas stove to propane is doable with the right steps. Always check safety rules before starting the process. Use proper tools and parts made for propane. Take your time to follow instructions carefully. If unsure, ask a professional for help.
A safe conversion helps your stove work well with propane. Enjoy cooking with your newly converted stove. Simple steps make the change smooth and safe.