Are you ready to enjoy the freedom of a propane grill but stuck with your natural gas setup? Converting your natural gas grill to propane might sound tricky, but it’s easier than you think.
Imagine the convenience of using portable propane tanks that let you grill anywhere, anytime. In this guide, you’ll discover simple steps to make the switch safely and quickly. Keep reading, and you’ll be grilling your favorite meals with propane before you know it.
Tools And Materials Needed
Before you start converting your natural gas grill to propane, it's important to gather the right tools and materials. Having everything ready will make the process smoother and help you avoid unnecessary trips to the hardware store. Plus, the right tools ensure safety and a proper fit for your new propane system.
Essential Tools For The Conversion
- Adjustable wrench:Needed to disconnect and reconnect gas lines securely.
- Screwdrivers (flathead and Phillips):Used to remove panels and adjust components.
- Teflon tape (gas-rated):Ensures airtight, leak-proof connections on threaded fittings.
- Pipe wrench or pliers:Useful for gripping and tightening stubborn fittings.
- Leak detection solution or soapy water:Helps you check for gas leaks after installation.
Materials Required For Conversion
- Propane conversion kit:Usually includes new orifices, regulators, and instruction manuals specific to your grill model.
- Propane regulator:Controls the gas pressure from your propane tank to your grill.
- Propane hose:Connects your propane tank to the grill securely and safely.
- Propane tank:Choose a size that fits your grilling needs, commonly 20 lbs tanks.
Why Not Skip The Conversion Kit?
You might wonder why you can’t just swap the gas source and call it a day. The conversion kit contains parts tailored to safely handle propane’s higher pressure and different combustion characteristics. Using the right orifices and regulators prevents flare-ups and ensures consistent heat.
Gathering all these tools and materials beforehand sets you up for a hassle-free conversion. Have you checked if your grill manufacturer offers a specific kit? It could save you time and avoid compatibility issues later on.

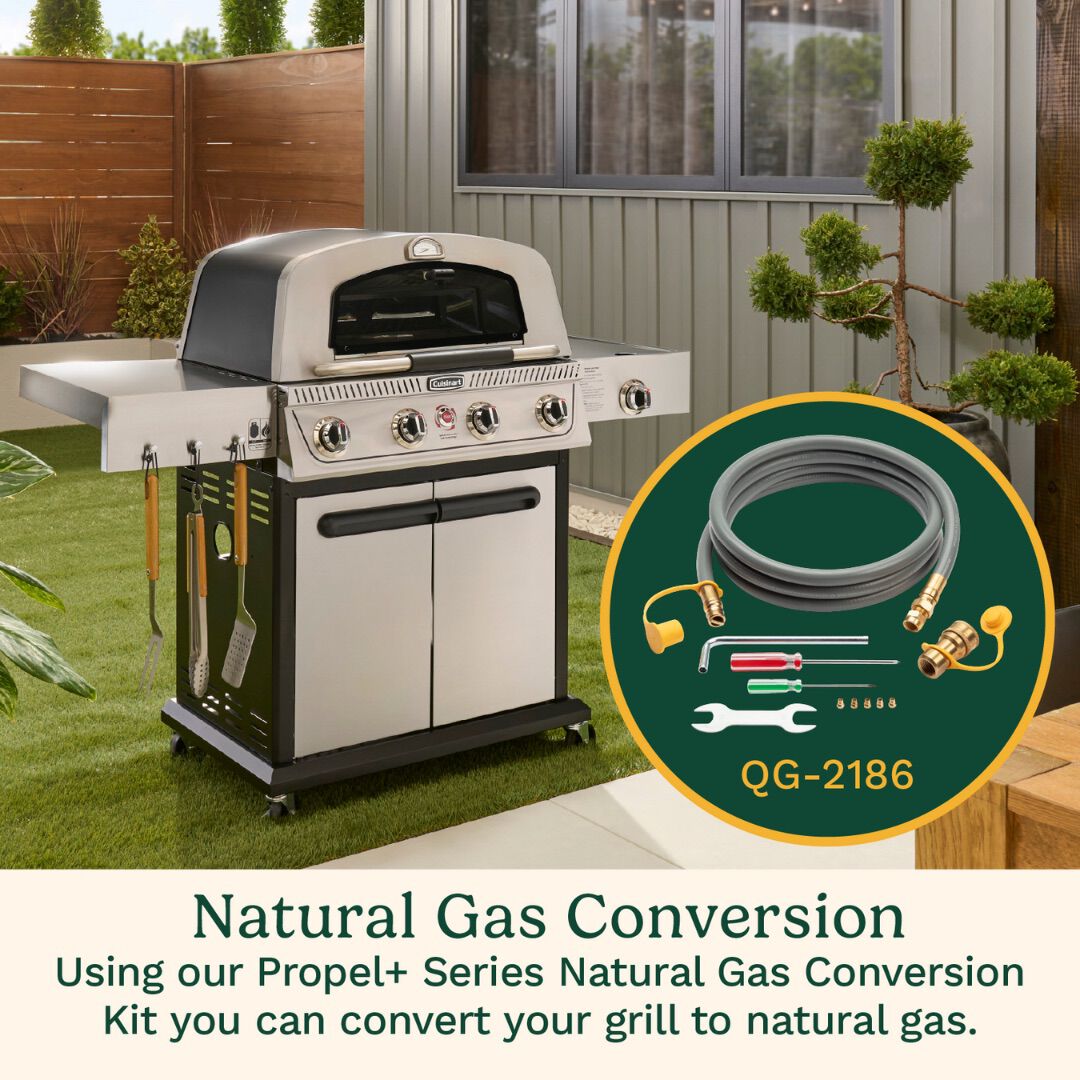
Credit: www.cuisinart.com
Safety Precautions
Safety is the foundation of any grill conversion project. Changing your natural gas grill to propane involves handling gas lines and connections that, if not done correctly, can pose serious risks. Taking the right precautions protects you, your home, and your loved ones.
Check For Gas Leaks Before And After Conversion
Leaks can be dangerous and hard to detect by smell alone. Use a soap and water solution to test connections for bubbles, which indicate escaping gas. Always perform this test both before you start and after you complete the conversion to ensure every joint is secure.
Turn Off Gas Supply Completely
Never work on your grill while the gas is still running. Shut off the main valve on your natural gas line and disconnect the grill from the supply. This simple step eliminates the risk of accidental gas release during the switch.
Use The Correct Propane Conversion Kit
Each grill model may require specific parts for conversion. Using a generic kit can lead to poor fitting and leaks. Always buy a conversion kit designed for your grill’s make and model to guarantee safety and proper function.
Inspect Hoses And Connections For Wear
Old or cracked hoses can fail under propane pressure. Replace any worn components before connecting to propane. You don’t want a hidden weakness turning into a safety hazard once you fire up the grill.
Ensure Proper Ventilation When Testing
Test your grill outdoors or in a well-ventilated area. Propane is heavier than air and can accumulate in low spots, increasing explosion risk. Good airflow helps disperse any accidental gas and keeps the environment safe.
Consult A Professional If Unsure
If you hesitate at any point or feel unsure about your skills, stop and ask for help. A certified technician can confirm the conversion is safe and compliant with local codes. Remember, your safety is worth the extra cost and effort.
Turn Off The Gas Supply
Before you start converting your natural gas grill to propane, turning off the gas supply is crucial for your safety. Even a small leak can cause serious accidents, so never skip this step. Taking a moment to double-check that the gas is fully off will give you peace of mind throughout the conversion process.
Locate The Main Gas Valve
First, find the main gas valve connected to your grill. It’s usually near the gas line where it enters the grill or at the gas meter for natural gas. Turning this valve clockwise shuts off the gas supply completely.
Check For Gas Flow
After turning off the valve, confirm there’s no gas flow. You can do this by trying to light the grill briefly or by listening closely for any hissing sounds. If you detect gas, turn off the valve again and wait a few minutes before testing.
Disconnect The Grill From The Natural Gas Line
Once the gas is off and confirmed, carefully disconnect the grill from the natural gas line. Use an adjustable wrench to loosen the fittings, but be gentle to avoid damaging the pipes. Keep a cloth handy to catch any residual gas or dirt.
Ensure Adequate Ventilation
While working around gas lines, make sure your workspace is well-ventilated. Open windows or grill outdoors to prevent gas buildup. Have a fire extinguisher nearby just in case, and never smoke or use open flames near the grill during this step.
Disconnect Natural Gas Line
Shut off the natural gas supply before starting. Carefully disconnect the gas line using the proper tools to avoid leaks. Ensure the area is well-ventilated and check for any remaining gas smell.
Disconnecting the natural gas line is a crucial step. It ensures safety and prepares your grill for conversion. Before you begin, gather necessary tools. This includes a wrench, pipe sealant, and safety gloves. Always prioritize safety. Turn off the main gas supply valve. This prevents any gas leaks during the process. Once you’ve taken these precautions, you’re ready to disconnect.
Gather Necessary Tools
- Wrench: Essential for loosening connections.
- Pipe Sealant: Helps secure connections later.
- Safety Gloves: Protects your hands.
Turn Off Main Gas Supply
Ensure the gas is off before starting. Locate the main valve. Turn it clockwise until tight. This step stops gas flow completely.
Loosen The Connection
Use the wrench to loosen the gas line connection. Turn counterclockwise to detach. Be gentle to avoid damaging the pipe.
Inspect For Gas Leaks
Once disconnected, check for any leaks. Use a soapy water solution on the pipe. If bubbles form, there’s a leak.
Cap The Gas Line
Secure the end of the pipe with a cap. Apply pipe sealant to ensure a tight fit. This prevents future leaks and keeps the area safe.
Check Safety Measures
Review all steps for safety. Make sure all connections are secure. Your grill is now ready for propane conversion.
Replace The Orifices
Replacing the orifices is a crucial part of converting your natural gas grill to propane. The orifices control the flow of gas to the burners, and since propane operates at a different pressure than natural gas, the orifices need to be swapped out to ensure safety and proper function.
Locate The Orifices
Start by finding the orifices on your grill. They are usually located at the end of each burner tube, near where the gas line connects. You might need to remove the grill grates and burner covers to access them easily.
Look for small brass fittings with tiny holes—these are the orifices. If you’re unsure, check your grill’s manual or look for online diagrams specific to your model. Knowing their exact location helps avoid unnecessary disassembly later.
Choose Propane Orifices
Not all propane orifices are the same size. You need to pick ones designed for your grill model and the right BTU rating. Propane orifices have smaller holes compared to natural gas to handle the higher pressure safely.
Consult your grill’s manufacturer or a trusted parts supplier to get the exact size. Using the wrong orifice can cause uneven flames or even dangerous leaks, so don’t skip this step.
Remove Old Orifices
Once you’ve found the orifices, use a wrench to carefully unscrew them. Be gentle to avoid damaging the burner tubes or threads. If they’re stuck, apply a little penetrating oil and give it some time before trying again.
Keep the old orifices in case you want to switch back to natural gas later. Also, double-check you’ve removed all the orifices before moving on. Missing one can throw off your grill’s performance.
Install New Orifices
Screw the new propane orifices into place by hand to avoid cross-threading. Then, tighten them securely with a wrench, but don’t overtighten—it can strip the threads or crack the orifice.
After installation, test each burner individually. Light the grill and observe the flame; it should be steady and blue with little yellow. If the flame sputters or is too high, recheck your orifice installation and connections.

Credit: us.amazon.com
Install Propane Regulator
Installing a propane regulator is essential when converting a natural gas grill to propane. The regulator controls gas pressure for safe and efficient grill operation. Propane requires a different pressure setting than natural gas. Using the correct regulator ensures steady flame and prevents leaks or damage.
Choose The Right Propane Regulator
Select a regulator designed for propane grills. Check the grill’s manual or label for recommended pressure. Most propane grills use a 10 psi regulator. Avoid using natural gas regulators as they do not match propane pressure needs.
Turn Off Gas Supply Before Installation
Ensure all gas valves are off before starting. Disconnect the natural gas line safely. This prevents gas leaks and possible accidents during installation. Safety first.
Attach Propane Regulator To Grill
Connect the propane regulator to the grill’s gas inlet. Use a wrench to tighten fittings securely. Do not overtighten, which can damage threads. Check for rubber gaskets or washers to ensure a tight seal.
Connect Regulator To Propane Tank
Attach the other end of the regulator to the propane tank valve. Turn the connection nut clockwise to tighten. Make sure the connection is firm and leak-free.
Mix water and dish soap in a spray bottle. Spray all connections. Turn on the propane tank valve slowly. Look for bubbles forming, indicating leaks. Tighten connections or replace faulty parts if bubbles appear.
Connect Propane Tank
Connecting the propane tank is a crucial step when converting your natural gas grill to propane. This connection ensures a steady and safe flow of fuel to your grill. Taking the time to do this properly will help you avoid leaks and enjoy a smooth grilling experience.
Check The Propane Tank And Regulator Compatibility
Before connecting, make sure your propane tank matches the grill’s regulator. Most grills use a standard 20-pound propane tank, but double-check your grill’s manual. Using the wrong regulator can cause pressure issues and affect grill performance.
Attach The Regulator To The Propane Tank
Start by screwing the regulator onto the propane tank valve. Turn it clockwise until it’s hand-tight. Avoid using tools, as overtightening can damage the connection or cause leaks.
Secure The Hose Connection To The Grill
Next, connect the hose from the regulator to the grill’s gas inlet. Ensure the connection is snug but not forced. A loose connection might lead to gas leaks, while forcing it can damage the fittings.
Test For Gas Leaks Safely
After connecting everything, check for leaks by applying a soapy water solution to the connections. Turn on the propane tank valve slightly. Look for bubbles, which indicate escaping gas. If you see bubbles, tighten connections and test again before lighting your grill.
Store And Handle Your Propane Tank Properly
Always place the propane tank in an upright position during use and storage. Keep it in a well-ventilated area away from direct sunlight or heat sources. Have you ever thought about how small changes in tank placement can improve safety?
Check For Gas Leaks
Checking for gas leaks is a crucial step when converting your natural gas grill to propane. Even a small leak can be dangerous, leading to fire hazards or health risks. Taking the time to thoroughly inspect your connections will keep you safe and ensure your grill works properly.
Prepare A Soapy Water Solution
Mix a few drops of dish soap with water in a spray bottle or bowl. This solution helps you spot leaks easily by creating bubbles at the leak points. Keep this mixture handy before you start testing.
Inspect All Connections
Spray or brush the soapy water on every connection point, including the regulator, hose, and fittings. Turn on the propane slowly and watch for bubbles forming. Bubbles mean there is a leak that needs fixing before you can use your grill safely.
Use A Gas Leak Detector
If you want extra assurance, use a handheld gas leak detector. These devices sense gas and alert you with sound or light. They provide a quick way to identify leaks that might be missed by the soapy water test.
Fixing Detected Leaks
If you find bubbles or get a detector alert, tighten the connections gently. Replace any damaged parts like cracked hoses or worn-out gaskets. Never ignore a leak; even the smallest one can become a serious problem.
Double-check After Repairs
After tightening or replacing parts, test all connections again with the soapy water or detector. Confirm there are no bubbles or alerts this time. This step ensures your grill is safe to use and ready for your next barbecue.
Test The Grill
Testing the grill ensures it works safely after conversion from natural gas to propane. Check for leaks and proper flame size before cooking. This step helps avoid hazards and guarantees even heat during grilling.
Testing your grill after converting it to propane is crucial. This ensures safety and proper functioning. A well-tested grill offers peace of mind during use. Follow these steps to confirm your grill's readiness.
Inspect The Gas Connections
Check all gas connections for tightness. Ensure there are no leaks. Loose connections can cause gas leaks. Use soapy water to detect leaks. Bubbles indicate a leak. Tighten any loose connections if needed.
Ignite The Burners
Turn on the propane tank valve. Ignite each burner individually. Make sure each burner lights up properly. Look for a steady blue flame. A yellow flame signals an issue. Adjust the air shutter if needed.
Check Flame Consistency
Observe the flame on each burner. Flames should be consistent and even. Uneven flames may indicate blockages. Clean the burners if necessary. Ensure proper air and gas mixture.
Test The Heat Distribution
Preheat the grill for 10 minutes. Check for even heat distribution. Use a grill thermometer for accuracy. Uneven heat can affect cooking results. Adjust burners for balanced heat if required.
Examine The Grill's Performance
Cook a small item to test performance. Observe cooking speed and efficiency. Ensure the grill reaches desired temperatures. Satisfactory performance confirms successful conversion. Adjust settings as needed for optimal results.
Troubleshooting Tips
Converting a natural gas grill to propane can bring many benefits, but sometimes issues arise. Troubleshooting helps fix these problems fast. It saves time and keeps your grill working well. Below are common issues and easy ways to solve them. Use these tips to enjoy your propane grill safely and efficiently.
Checking For Gas Leaks
Leaks are dangerous and must be found quickly. Use soapy water on connections and hoses. Bubbles show where gas escapes. Tighten loose fittings or replace damaged parts. Never use a flame to check for leaks.
Adjusting The Air Shutter
Improper air mix causes yellow or weak flames. Open or close the air shutter near the burner. Flames should be blue with small tips. Adjust slowly and test the flame after each change.
Cleaning The Burner Ports
Clogged burner ports reduce flame quality. Remove the burners and clean ports with a soft brush or needle. Keep holes clear of dirt and spider webs. Clean burners help even heat and flame control.
Ensuring Proper Regulator Connection
The propane regulator controls gas flow. Check it is connected tightly to the tank and grill. Replace the regulator if it shows cracks or damage. Use the right regulator for your grill model.
Testing The Ignition System
If the grill won’t light, the ignition system might be faulty. Check the battery if your igniter uses one. Clean the igniter and electrode to remove grease or debris. Manually light the grill if needed while fixing the igniter.
Verifying Hose Compatibility
Natural gas hoses differ from propane hoses. Use hoses made for propane to avoid leaks and safety risks. Replace old or cracked hoses with new ones designed for propane grills.
Credit: www.cuisinart.com
Frequently Asked Questions
How Do I Convert A Natural Gas Grill To Propane?
To convert, replace the orifices with propane ones and adjust the regulator. Ensure the hose fits propane tanks. Follow manufacturer instructions carefully for safety.
What Tools Are Needed For Propane Grill Conversion?
You’ll need a wrench, screwdrivers, propane orifices, and a compatible regulator. A leak detector spray is also helpful for safety checks.
Is It Safe To Convert A Natural Gas Grill To Propane?
Yes, if done correctly with proper parts and precautions. Always check for leaks and follow safety guidelines during conversion.
Can I Use The Same Hose For Propane Conversion?
No, natural gas and propane require different hoses. Use a hose specifically rated for propane to ensure safety.
Conclusion
Converting a natural gas grill to propane is simple with the right steps. Always check parts and safety rules first. Use correct tools and follow instructions carefully. This change lets you enjoy grilling almost anywhere. Take your time and do each step right.
Soon, you’ll have a propane grill ready to cook tasty meals. Grilling outdoors just got easier and more flexible.